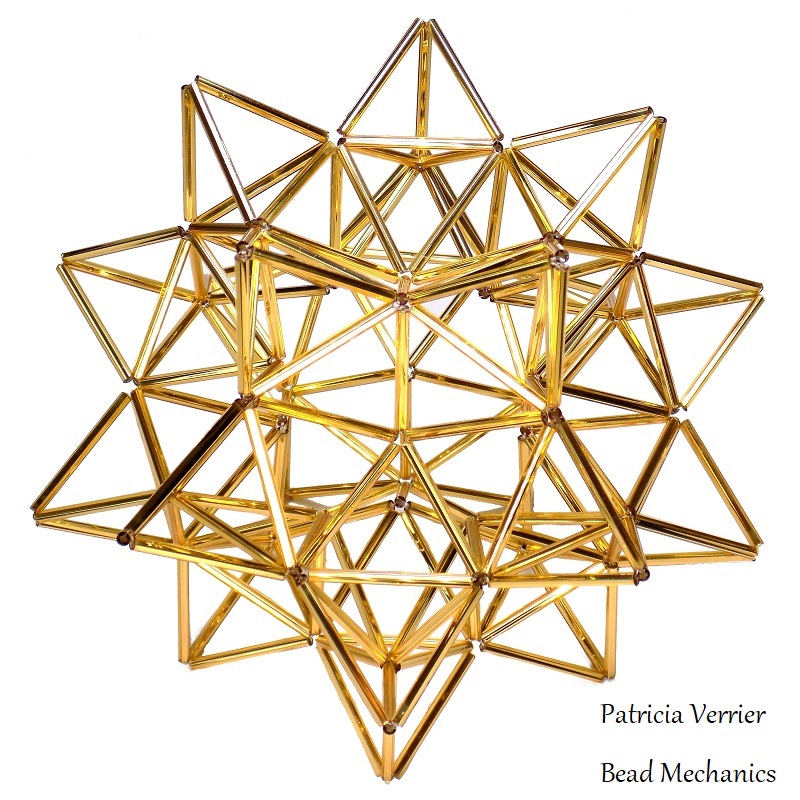
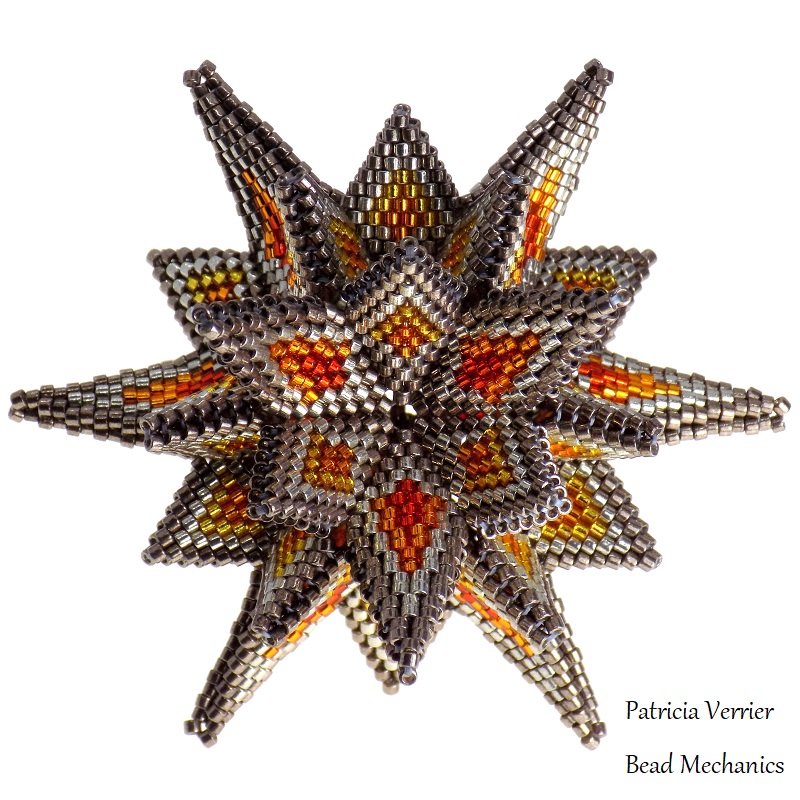
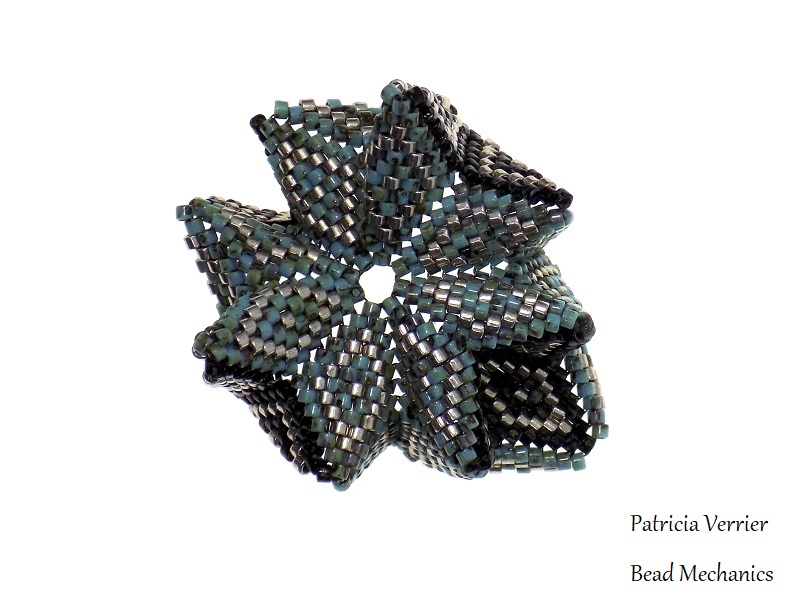
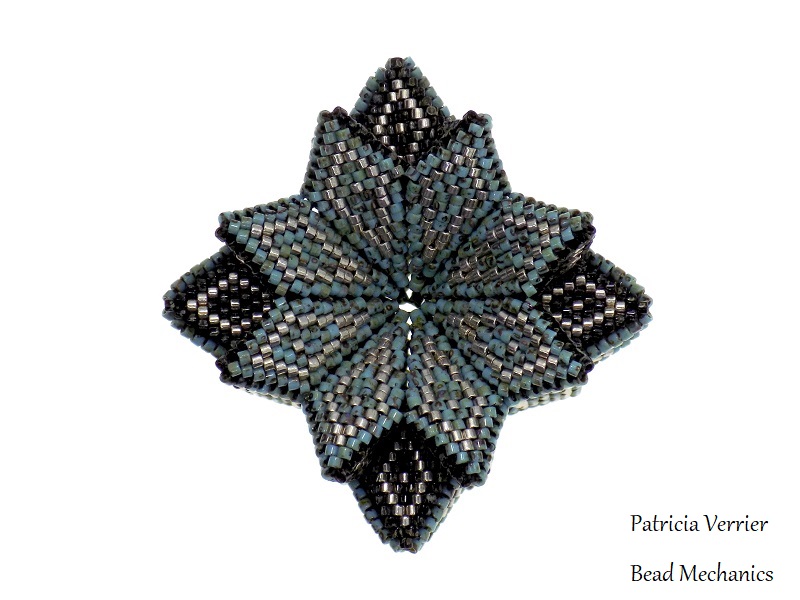
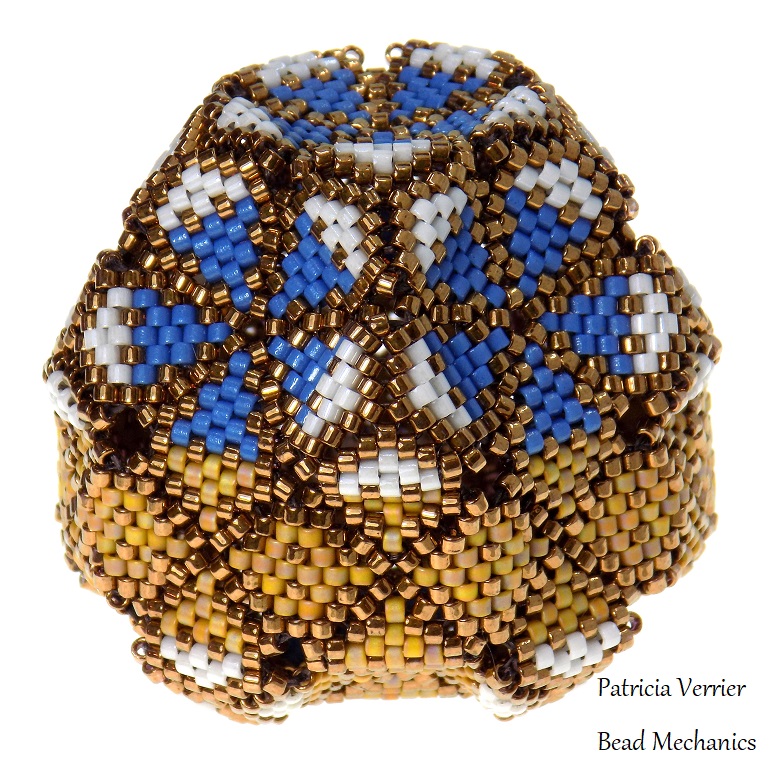
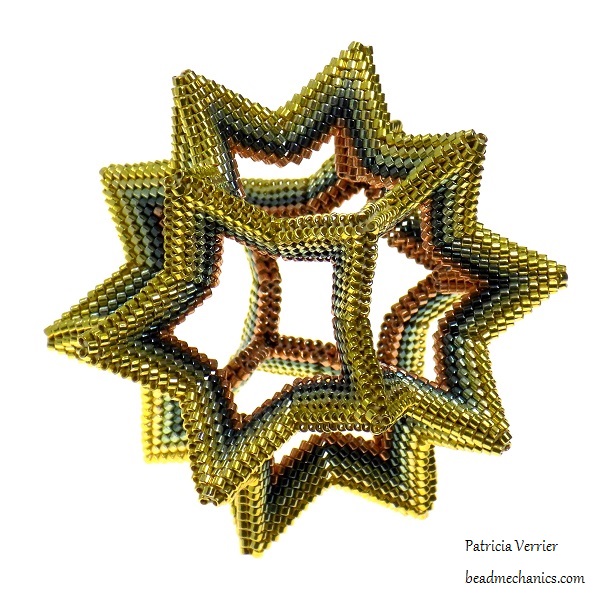
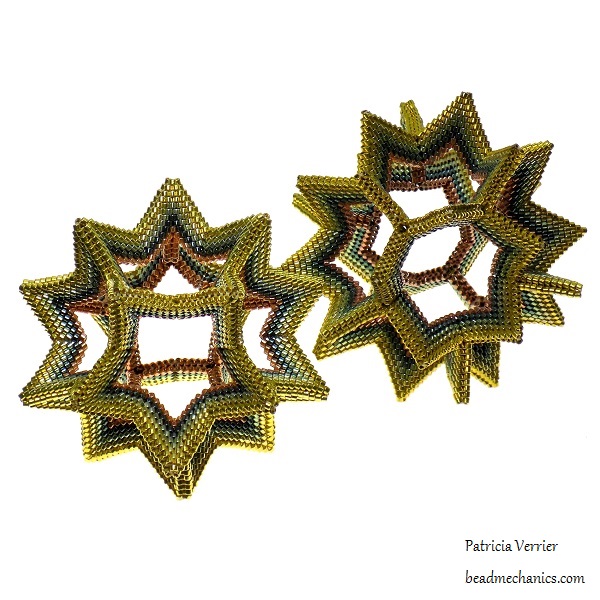
I had a bit of free time this week so have put together some diagrams for some different colourways for the interlinked tetrahedra shape!
There are step-by-step diagrams for the silver-yellow-green, yellow-orange-red, silver-blue-purple and green-yellow-silver-blue-purple colourways. The pdf is available here: Interlinked Tetrahedra Additional Colourway Diagrams.
They match the steps in the original 3- or 5-colour instructions, which you can find here.
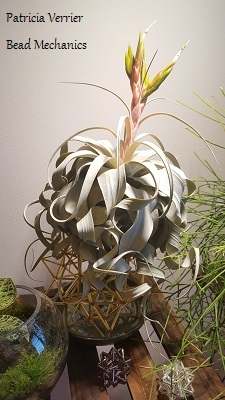
I made this airplant stand last year. It’s based on an icosidodecahedron, and is both partially augmented and partially excavated.
Augmentation means that you add another shape to each face – in this case it’s a tetrahedron on each triangle face. Since an icosidodecahedron has both triangle and pentagon faces, this means only some of the faces have been augmented, so it’s a partial augmentation.
Excavation means sort of the opposite – where you would join five triangles to make a dome or pyramid over a pentagon face to augment it, excavation is the reverse – the dome or pyramid points down into the centre of the polyhedron, making a bowl-like depression. Because this is only done to the pentagon faces again it’s a partial excavation.
The combination of the two gives and interesting combination of peaks and valleys that I really like, and also makes it an excellent air plant stand! The shape itself is just made by using a modified form of right-angle weave to place the bugles over each edge of the polyhedron.
I used 30mm bugles meaning the finished piece is quite large, so it became home to a Tillandsia Xerographica, one of the bigger airplants! Here it is back when I finished it last summer:
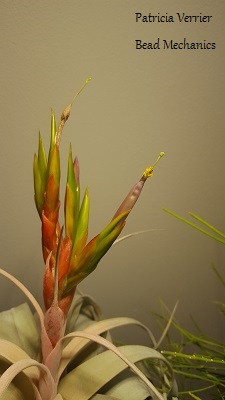
And here it is now – the airplant has a beautiful flower spike on it at the moment so is clearly happy with the stand!
The flowers are really interesting – most of the spike is the flower bract, while the flowers themselves are quite small with tightly closed pale pink petals:
This isn’t my first attempt at combining plants and beads either – I’ve made a few smaller airplant stands from bugle beads too, although they don’t currently have any airplants in them.
They’re only suitable for very small plants, and the ones that were in them have outgrown them. They’d probably be better if they were the other way up, although I’d need to take care to find airplants that are happy growing upside down if I did that.
Still a bit of a work in progress, but a fun series of experiments!
The animations of the icosidodecahedron shown in this post were created with Stella4D Pro.
A new tutorial is available in my Etsy shop for Mira Star! This is a truncated octahedron made from warped hexagons in a similar way to Hypernova, but with a twist – it uses a mix of 1-drop and 2-drop peyote to create the different length sides and add extra dimension to the piece!
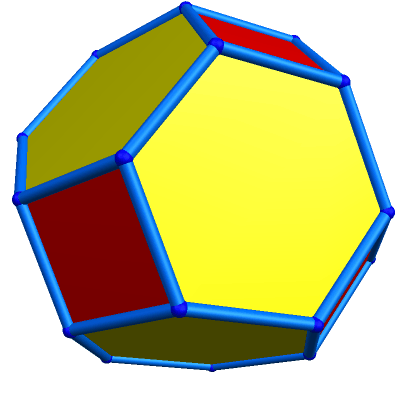
A truncated octahedron is an Archimedean solid, and it has square and hexagon faces:
I think the combination of the two different types of faces with the different types of peyote works really well! The shape looks very different from different angles:
I named it Mira Star as the different lenghs of the sides made me think of variable stars, stars which periodically increase and decrease in brightness. A Mira variable is a particular type of these variable stars.
I love the orange silver lined beads I used in this piece, but I also made a version in green as well:
I really like this version too, not sure which is my favourite!
I decided to add a cord to this one so it can be hung as an ornament – it looks really good like this as you can rotate to see all the different sides.
Both colourways and a guide on how to make the cord to hang it as an ornament are in the tutorial.
Happy beading!
The animation of the truncated octahedron shown in this post was created with Stella4D Pro.
About two years ago I posted about Archimedean Edge Hyparhedra – Archimedean polyhedra made by placing warped squares over the edges of the polyhedra. At that point I’d completed 3 of the 13 polyhedra, and started 3 more. I thought it was about time for an update on my progress on this series – I now have 7 of them completed!
Here’s a close up of the snub dodecahedron. This one is a really interesting shape, and it’s also a chiral polyhedron – it looks different reflected in a mirror – so I might make a mirror image to match when I eventually finish this series! Because of the angle of the edges of this polyhedron the warped squares end up curving the wrong way to form surface, so it ends up inside out and looking like its dual shape like the cuboctahedron.
The rhombicosidodecahedron however workd really well with the warped squares! It took me a while to finish this one as it was a lot of squares (120!) but I’m really pleased with how it turned out.
The truncated icosidodecahedron turned out really well too. It didn’t take quite as long as it’s only 60 squares, but was still a bit of a marathon. I really like this shape though, it was one of the very first ones I started and I’m really glad to have finished it at last.
The last shape, the truncated cube, was more challenging. The problem with this one is that it has octogonal faces, which need 8 warped squares to join together. Unfortunately, 8 warped squares joined together are not flat or concave, but instead start to ruffle and concertina and don’t make a very good interpretation of a flat shape – here’s my initial attempt::
It just wasn’t going to work, but I realised that if I used 2-drop peyote on the parts of the warped square that join into the octagons then they would be more pointy and the shape would be more concave rather than starting to ruffle like above. Fortunately this worked, and made an interesting shape!
The 2-drop octagons really give it a different character to the other shapes:
I was wondering how I would do the 4 Archimedean solids which have octagon and decagon faces, as I didn’t think they would work with the normal warped squares, so I’m glad I’ve found a solution and can now make the other 3 – a truncated cuboctahedron, a truncated dodecahedron and a truncated icosidodecahedron.
That leaves me with the snub dodecahedron and rhombicuboctahedron to do with the normal 1-drop warped squares, both of which are in progress. I think the snub dodecahedron will end up like the snub cube and cuboctahedron, looking more like its dual. I’m not sure about the rhombicuboctahedron yet, it could go either way or not work at all, and might have to be done with the 2-drop method instead. Hopefully it will take me less than 2 years this time to complete the set!
This one is quite a bit smaller than the J68 I made for the US project, but still took me a while to make as it has a lot of components. There are 15 triangles, 15 squares and 7 pentagons in total, and it is made up of a pentagonal cupola (which is Johnson solid number 5) and a pentagonal rotunda (Johnson solid number 6) joined together by a decagonal prism (essentially a ring of ten squares around the middle).
The J68 I made also has a pentagonal cupola as part of the shape (this is a decagonal face made up of a pentagon surrounded by squares and triangles) so I thought it would be nice to use the same colours to highlight the connection between them and the two projects.
The shape is interesting as it looks completely different from different sides. I really like the pentagonal rotunda side (a partial icosidodecahedron made from pentagons and triangles) as well.
I really glad that I got to make a second Johnson Solid for the UK project – it’s been fun making a piece that’s very different to the other shape!
Here’s a variation on my Sunburst dodecahedron from a while back. Unfortunately it wasn’t very sunny when I tried to photograph it though!
It’s made in the same way with Sue Harle’s diagonal tubular peyote technique, but the construction is a bit different. Here it is side by side with the original version:
The difference is where the outward points are on each side – in the original they are in the middle of the edges of the polyhedron, while in the variation they are at the vertices. I really like the contrast between the two shapes!
This technique is so flexible – which means I have a lot more polyhedra like this planned!
The original five colour version of the bugle bead interlinked tetrahedra is available here as a pdf: Five Colour Interlinked Tetrahedra Tutorial. This version uses a different colour for each individual tetrahedron.
Three Colour Interlinked Tetrahedra
A three colour version of the interlinked tetrahedra tutorial is available here: Three Colour Interlinked Tetrahedra Tutorial. This version uses three different colours of bugles in each tetrahedron.
The animations above were made using Stella4D Pro.
Additional Colourways
Diagrams for other colourways are available here: Interlinked Tetrahedra Additional Colourway Diagrams. These are diagrams for each step for the silver-yellow-green, yellow-orange-red, silver-blue-purple and green-yellow-silver-blue-purple colourways.
Kits
Kits for both versions are available in my etsy shop!
A new tutorial is available in my Etsy shop for the Rhombic Mosaic icosahedron! This icosahedron is Not Made From Triangles! Instead it uses peyote diamonds for a new take on this basic geometric shape!
This method of making an icosahedron means than you get distinct triangular faces rather than the diamond shaped faces you get if you use triangles. Here’s a comparison of two – Rhombic Mosiac is on the left and an icosahedron made from peyote triangles on the right:
I really like the effect this construction method gives! I started working on this idea last year with my initial Not Made From Triangles tetrahedron:
Since then I’ve tried a few other shapes as well – here is a Not Made From Triangles octahedron along with the triangle version:
I really enjoy making polyhedra using this method and have a number of other shapes already planned!
The pattern in the tutorial uses five different colours for the faces of the icosahedron and has every possible combination of each five at each vertex exactly once. Both colourways are in the tutorial too!
A little while ago I wrote about the Beaded Johnson Solids Project set up by Diane Fitzgerald, a project to make all 92 Johnson solids out of beads. I volunteered to make number 68, the Augmented Truncated Dodecahedron. After a lot of time spent making decagons here it is!
I’ve named the beadwork version Reflecting Pool. In total it’s made from 11 decagons, 1 pentagon, 5 squares and 25 triangles. To give a better idea of the shape here’s an animation of the polyhedron made using Stella4D Pro:
Here’s the net of the beadwork shape before it the final assembly. I think it looks like a series of connected pools, which is where the name Reflecting Pool came from.
Before I started joining the beadwork net together I did a trial run with a paper model – fortunately my beadwork skills are better than my papercraft skills!
I really like how the shape turned out. The decagons seem quite sensitive to even the small size variations in the beads and so ended up slightly concave rather than as flat as the ones I made initially. However, I really like how they end up looking when joined together.
I’m tempted to make a plain truncated dodecahedron, with just decagons and triangles, however it might have to wait a while until I manage to make 12 more decagons!
Making polyhedra using round beads and polyhedral angle weave is my current favourite bead technique! Here’s an augmented dodecahedron made using 4mm beads:
This is a dodecahedron with extra dodecahedra added to each face (augmentation). In theory there should be a slight gap between each neighbouring dodecahedron, but with the beadwork you can merge them together to end up with this shape.
It did require quite a lot of concentration to weave but it was still an enjoyable experiment. I’m definitely going to be trying more shapes like this!