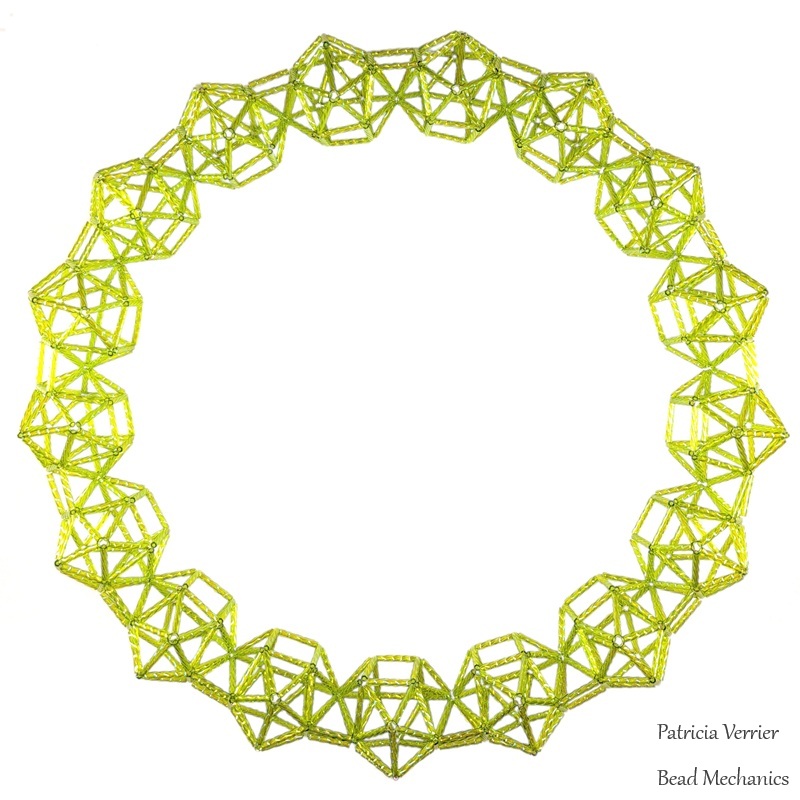
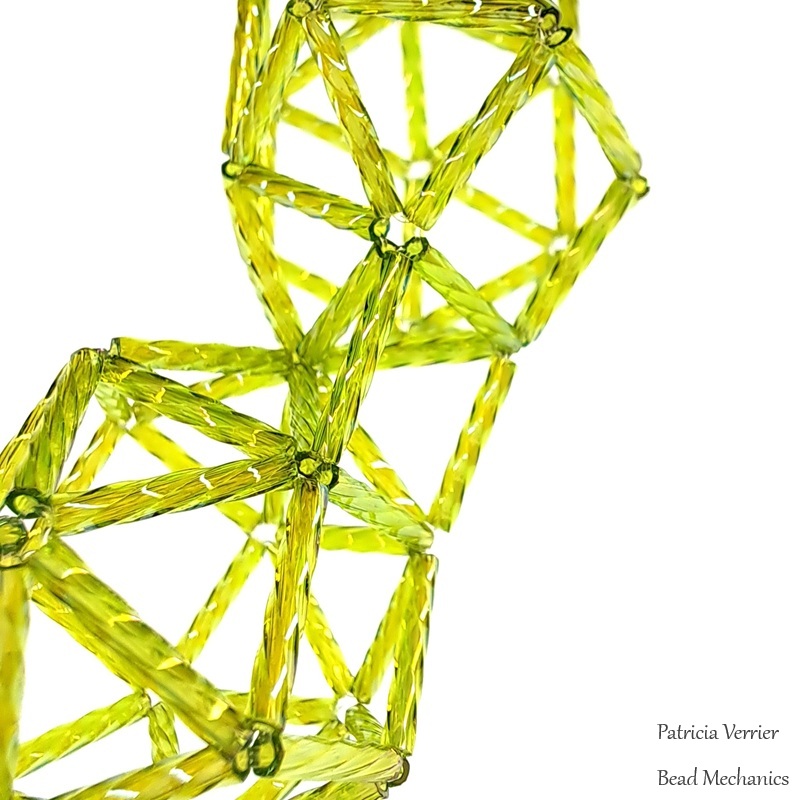
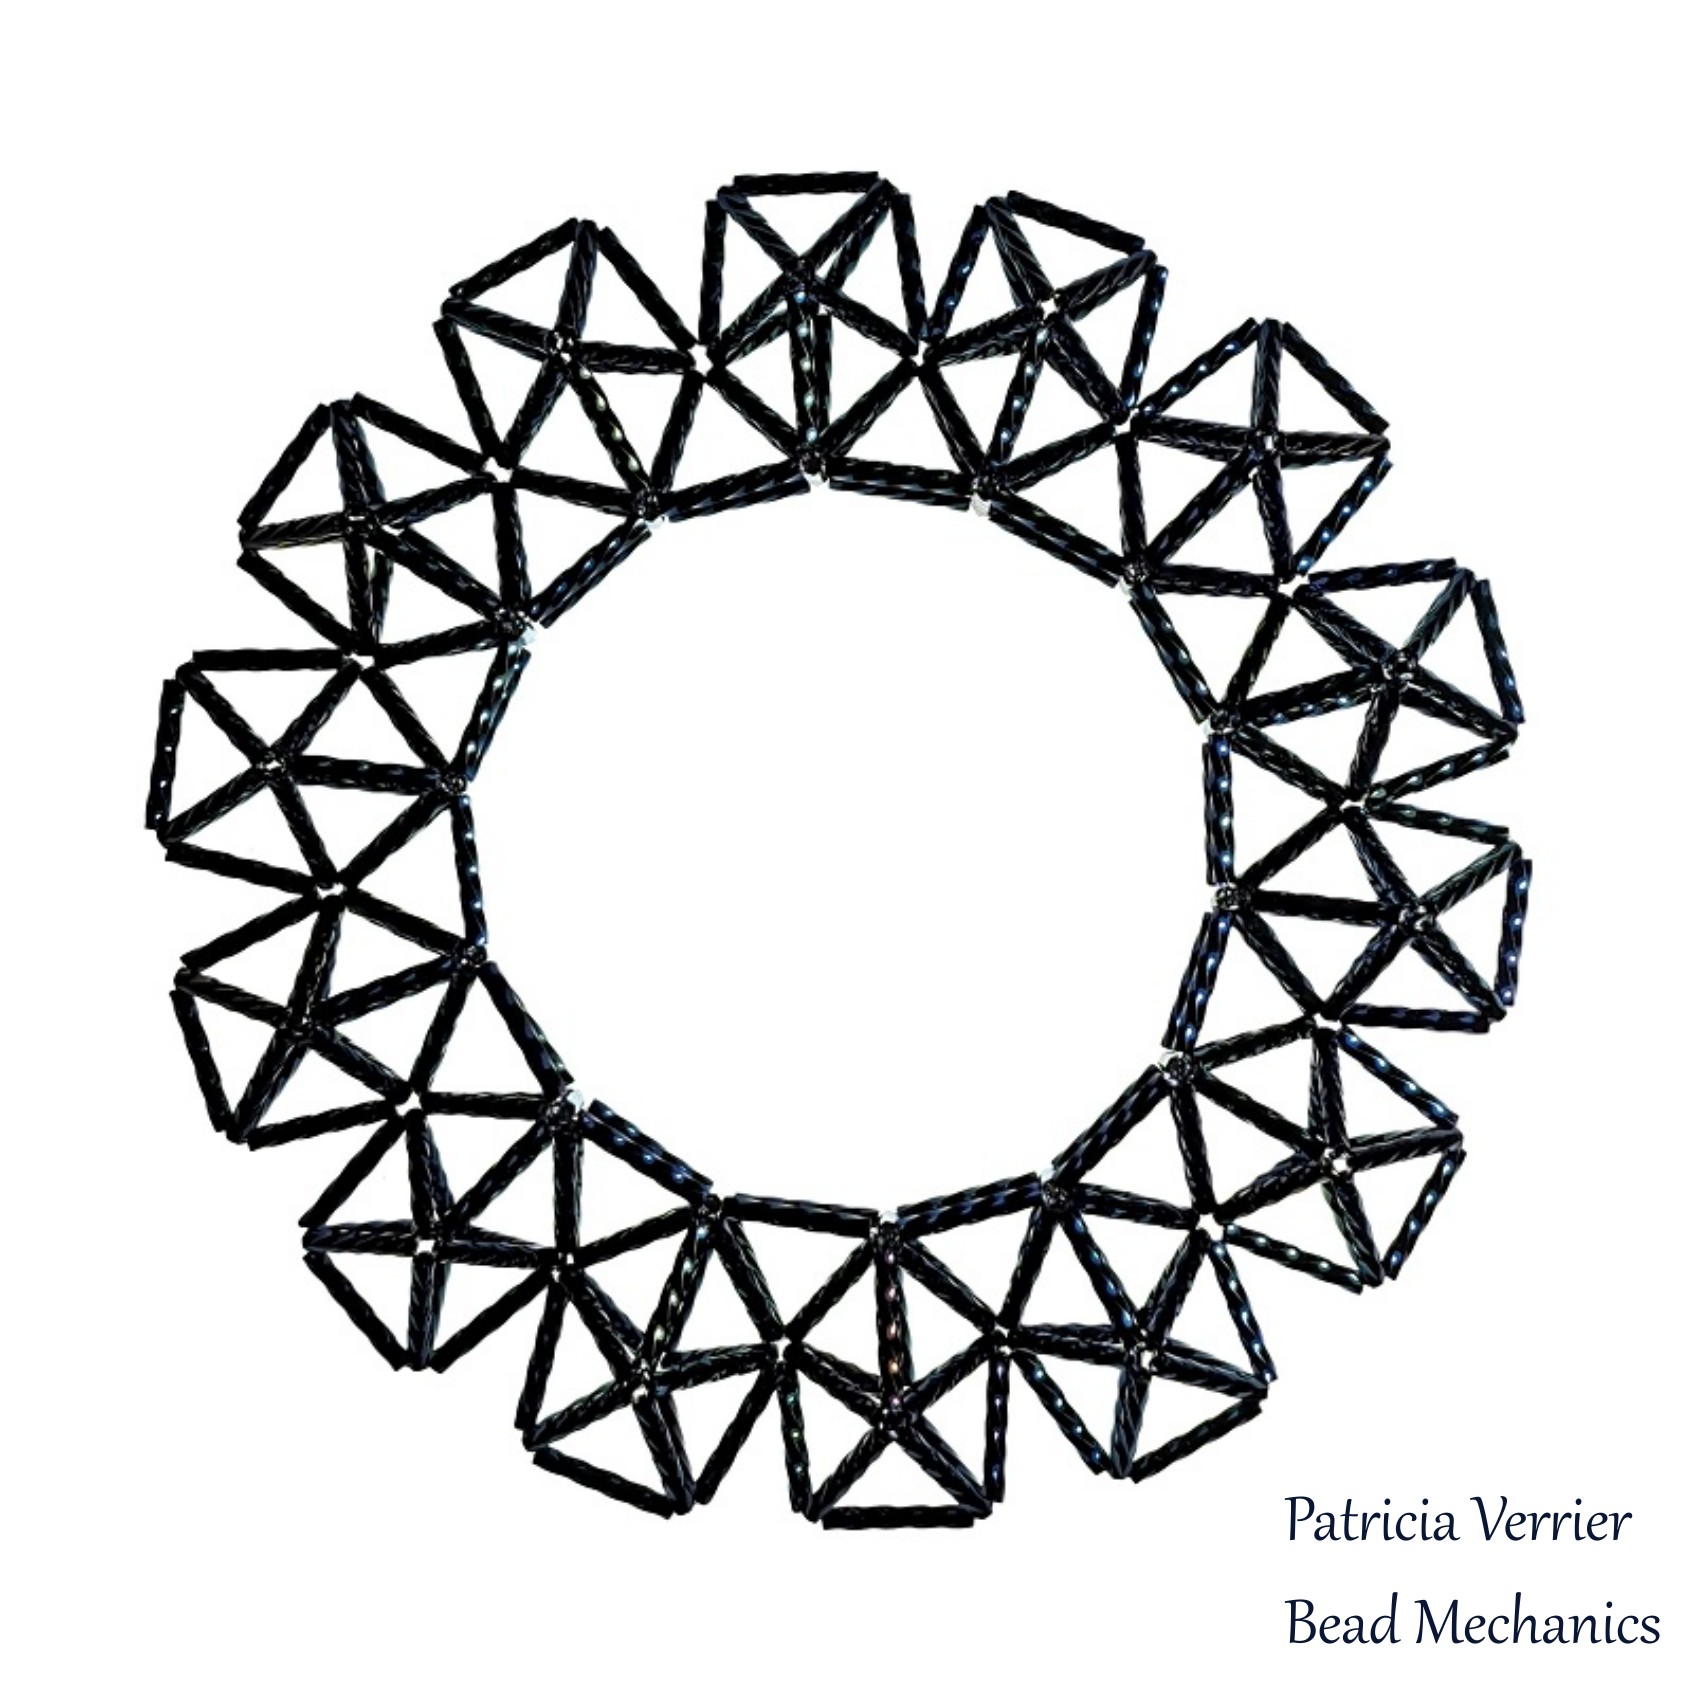
A Disphenocingulum is Johnson Solid J90, as is made up of 4 squares and 20 triangles. It’s sets of triangular pyramids joined together with pairs of squares:
It’s not the easiest shape to make, as it’s easy to lose track of the triangles, but it got easier after 17 of them! It’s made with polyhedral angle weave, 12mm bugle beads and nylon monofilament like the others in the series.
The disphenocingulum are joined together square pyramids on the outside of the ring, with the base of the pyramid linking up with a pair of the squares on the J90s to make a ribbon of squares all around the edge.
Like most of this series, I learnt about this shape on Rafael Millán’s GeoMag website. It’s much larger than the other three in this series, and unfortunately it’s not very stable at all. The disphenocingulum themselves tend to collapse at the slightest touch, and generally look a little bit warped. This means the ring is not very stable as well, as the polyhedra need to be exactly in the right position to keep it in shape.
This was the last in a series of rings of polyhedra – here are all four together:
From left to right it’s a ring of 14 snub disphenoids (J84), a ring of 15 hebesphenomegacoronona (J89), a ring of 16 sphenocoronae (J86) and this ring of 17 disphenocingulum (J90). This was a fun series to make, and I think I’ll try and hang them on a wall somewhere they will catch the light, as I love how the rainbow finish twisted bugle beads sparkle in the sun!
Next in the series of bugle bead rings of polyhedra is a ring of 16 Sphenocoronae!
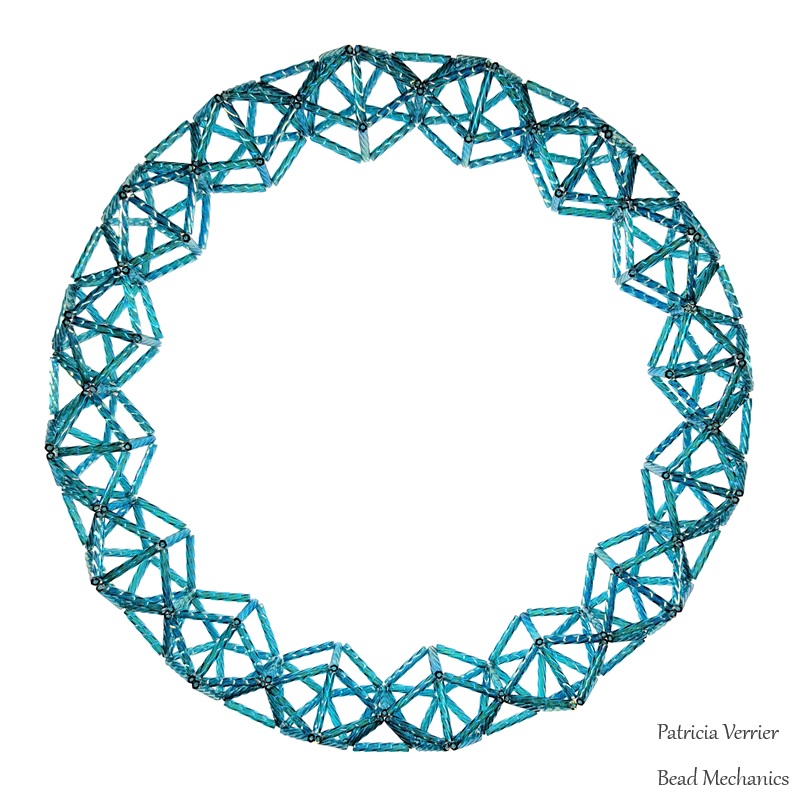
A Sphenocoronae is another Johnson Solid – this time J86. It’s made up of 12 triangles and 2 squares. It’s essentially two pentagonal pyramids on a base of 2 squares, with 2 more triangles filling in the gaps:
It’s quite a nice shape to weave together, and like the previous two rings this one is made with 12mm bugles, nylon monofilament and polyhedral angle weave. It does use an extra “linking” bugle to join the polyhedra together – forming a tetrahedra in between each sphenocoronae on the outside of the ring.
This one is quite a bit larger than the other two, so doesn’t work as a bangle with 12mm beads. I’m enjoying making this series though and have one more shape to try!
A Hebesphenomegacorona is one of the Johnson Solids – J89 – and is made up of 18 triangular and 3 square faces. It’s an odd shape, with the 3 squares forming a “base” surrounded by pyramids of triangles.
I learnt about this shape from a GeoMag version posted by Livio Zucca. There are no additional joining shapes in this piece, it’s just 15 identical polyhedra joined on a pair of faces. It’s slightly crowded, as it isn’t a perfect circle, but that also means it’s a very stable shape.
Like the previous ring this one also uses 12mm bugle beads and nylon monofilament and is weaved with polyhedral angle weave. It’s slightly larger than the ring of snub disphenoids, but it’s also just the right size to be worn as a very chunky bangle!
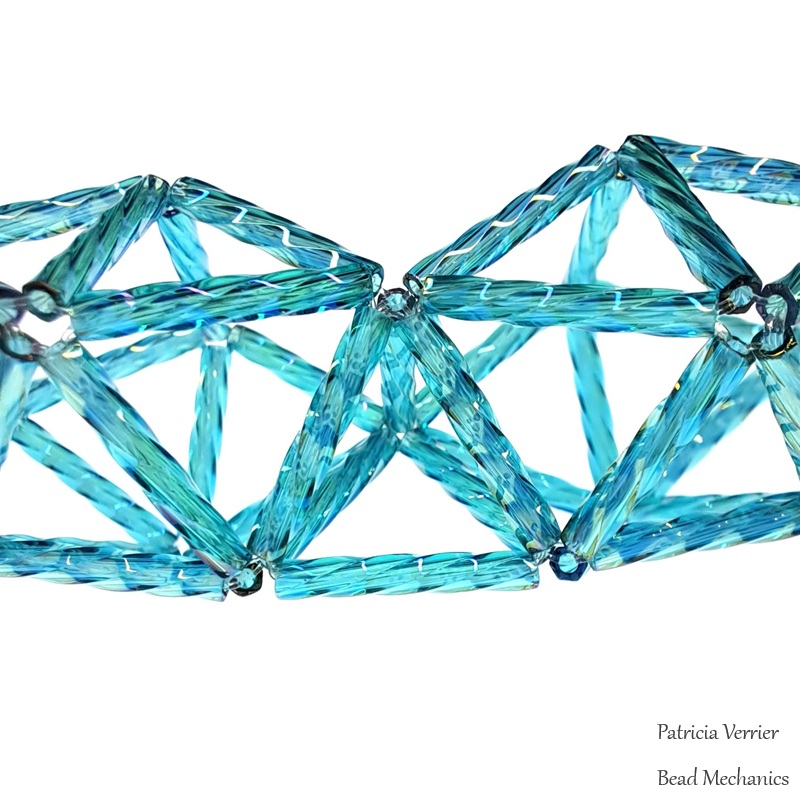
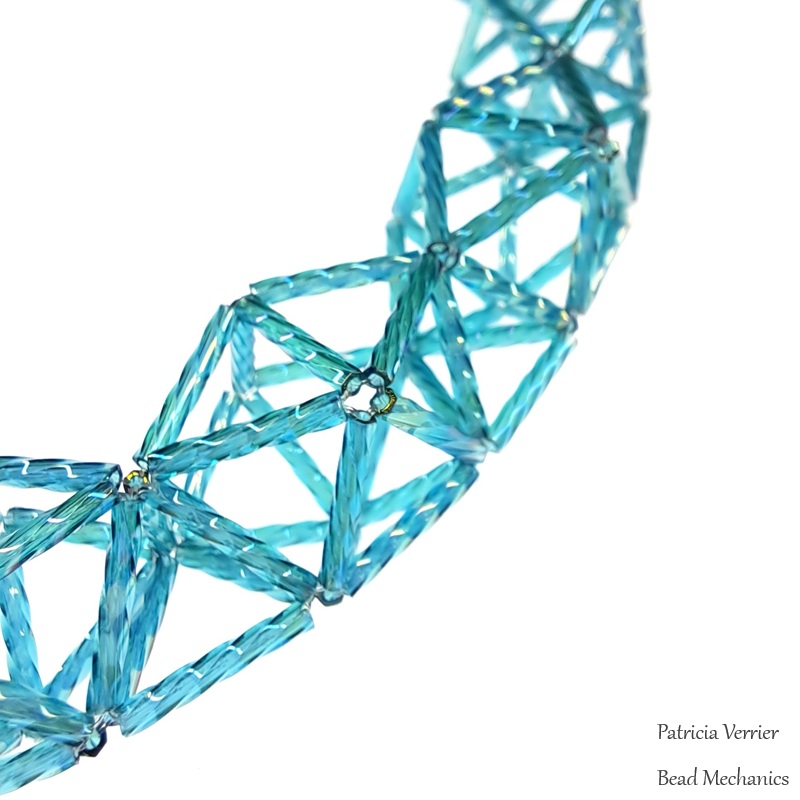
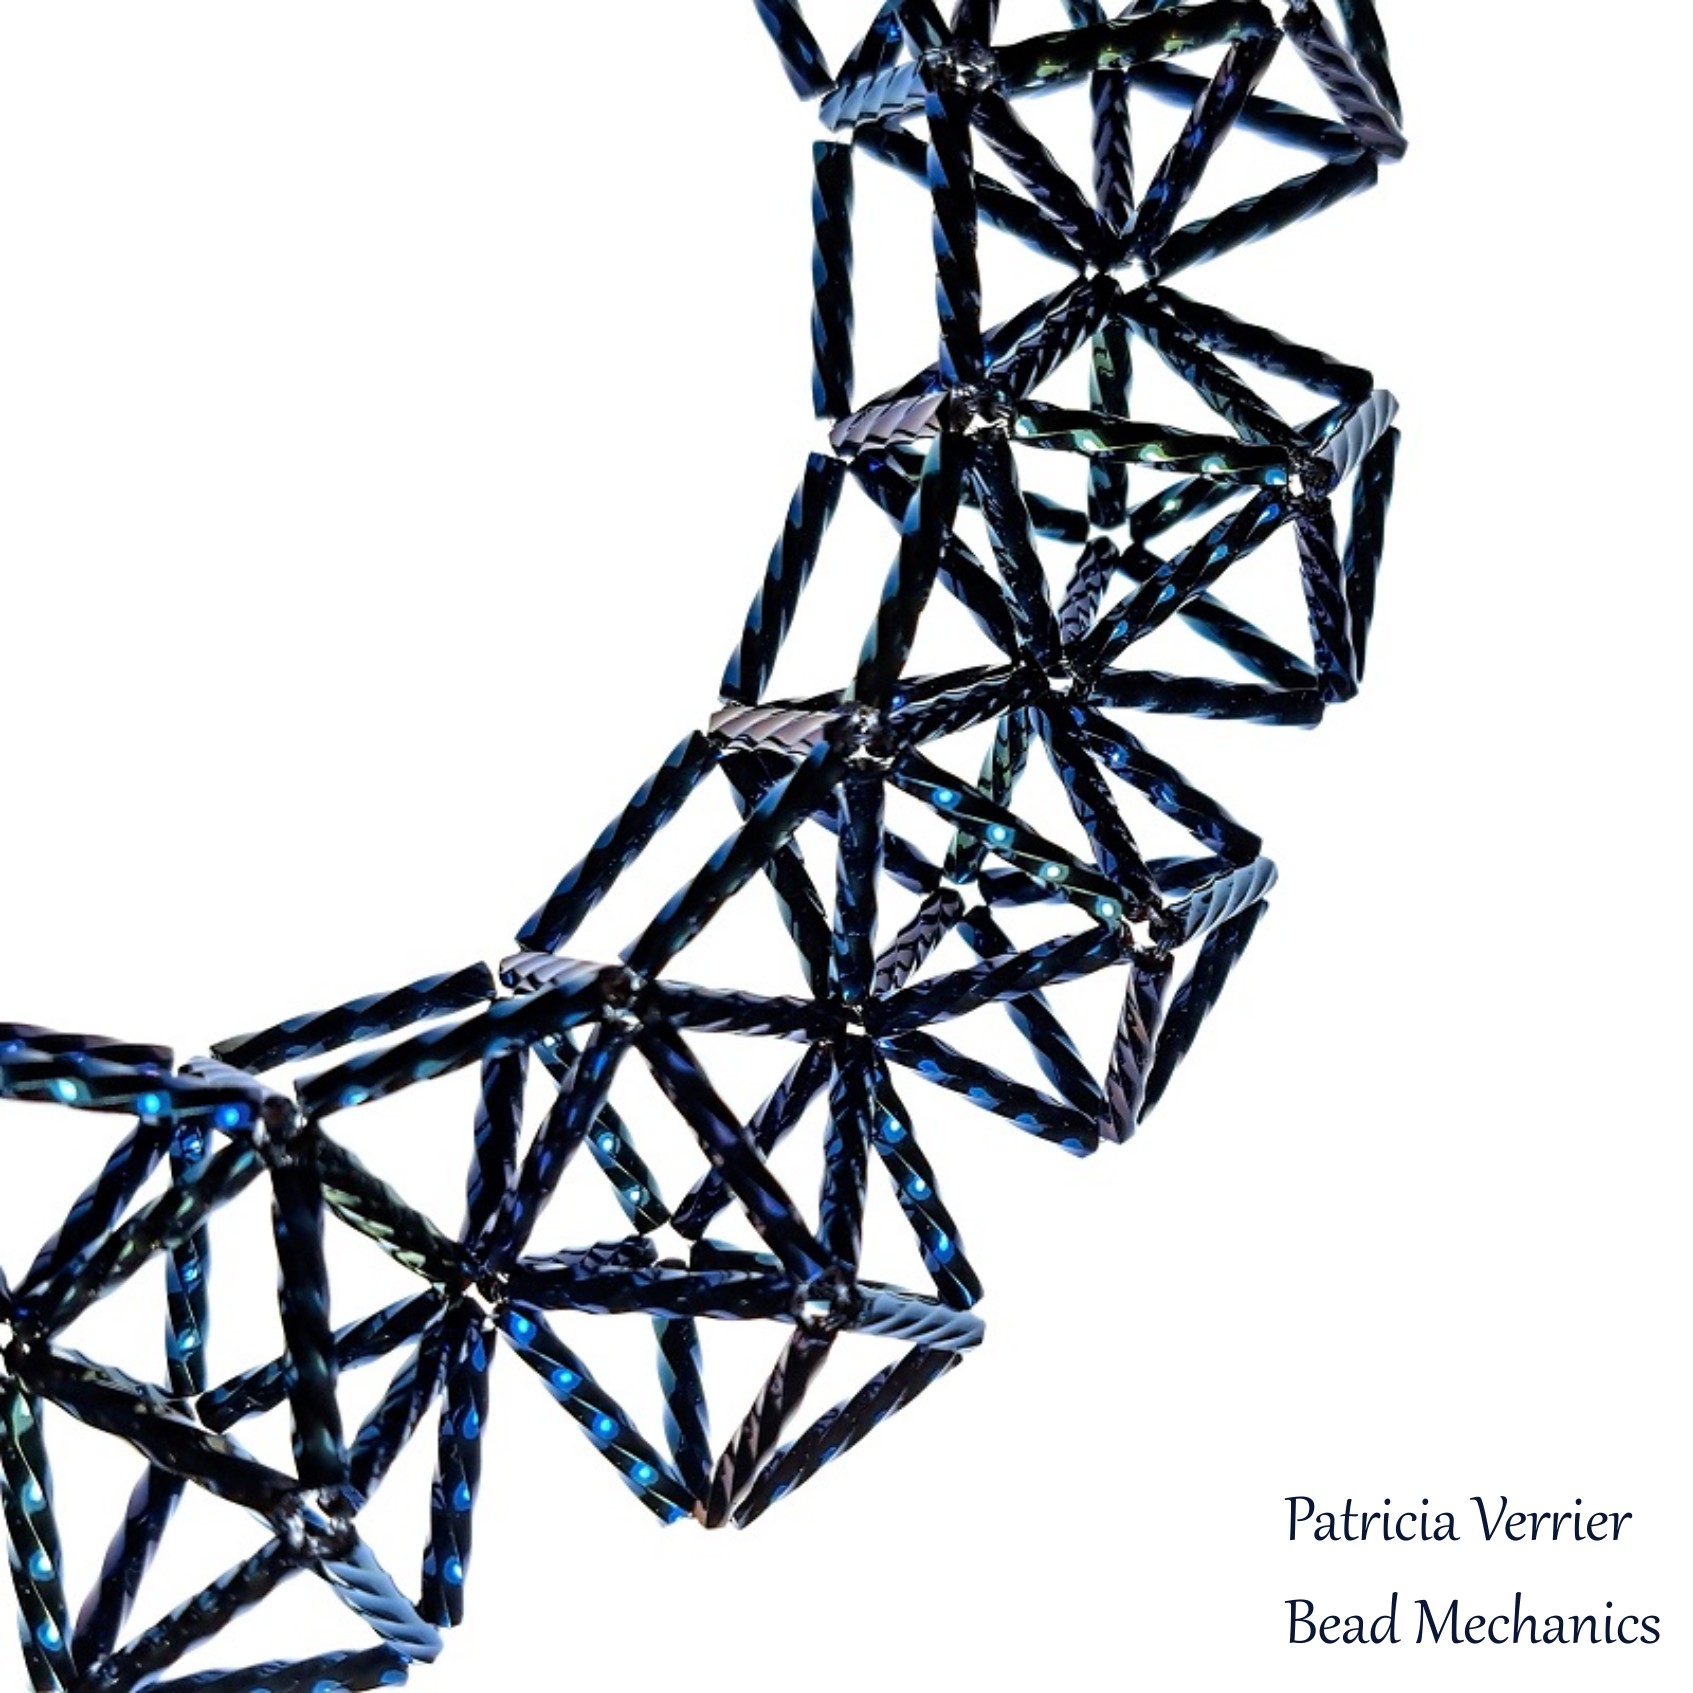
After a bit of trial and error with various sizes of bugle beads I’ve managed to succeed in making a bugle bead version of the well-known pentagon tangle! This shape is made from six intersecting pentagons, woven together to form a rigid structure.
It’s one of a type of shape known as a Regular Polylink or Orderly Tangle, and there’s quite a bit of research into them. This particular one turned out to work with 20mm bugles, and my first attempt above used straight bugles and worked really well. My second attempt below used twisted bugles, which are a bit thinner so it’s not as stable as the first attempt.
It’s turns out to be quite difficult to find six different colours of bugles, let alone ones that go well, and as a result the first two I made are in a selection of slightly random colours For the third attempt I managed to find a variety of black, grey, white and clear beads, which is so far my favourite version.
This shape turned out to be far more challenging than the interlinked tetrahedra, and although I’ve made three of them now I still don’t have a good method to follow. However, I’ve managed to get more suitably sized bugles, so the research and development continues!
Happy New Year all! Looking back on last year I realise I didn’t manage to post very much beadwork at all – so I’m going to start this year off with a few posts to try and rectify that!
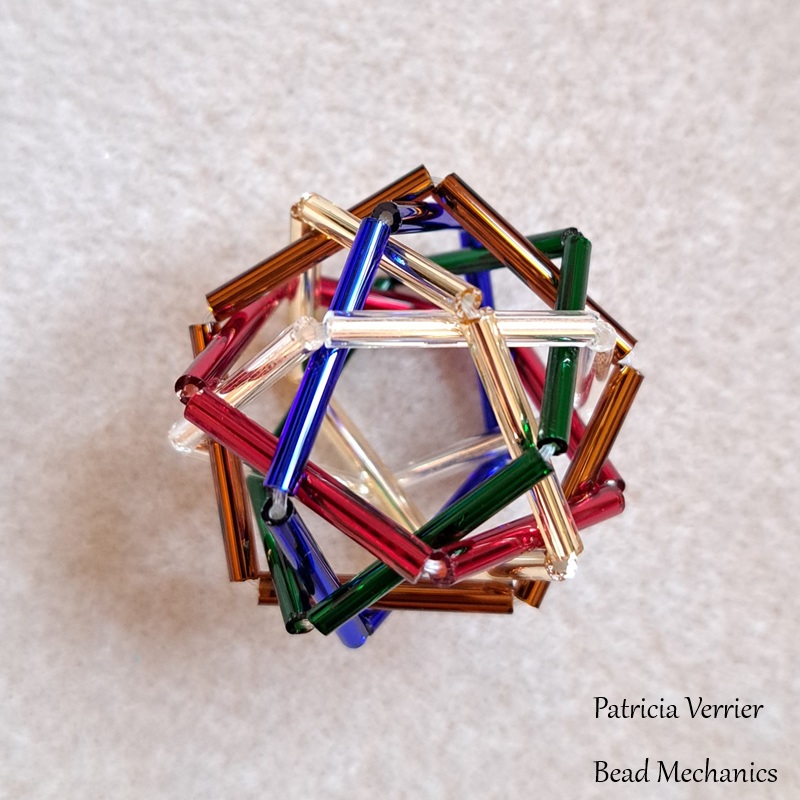
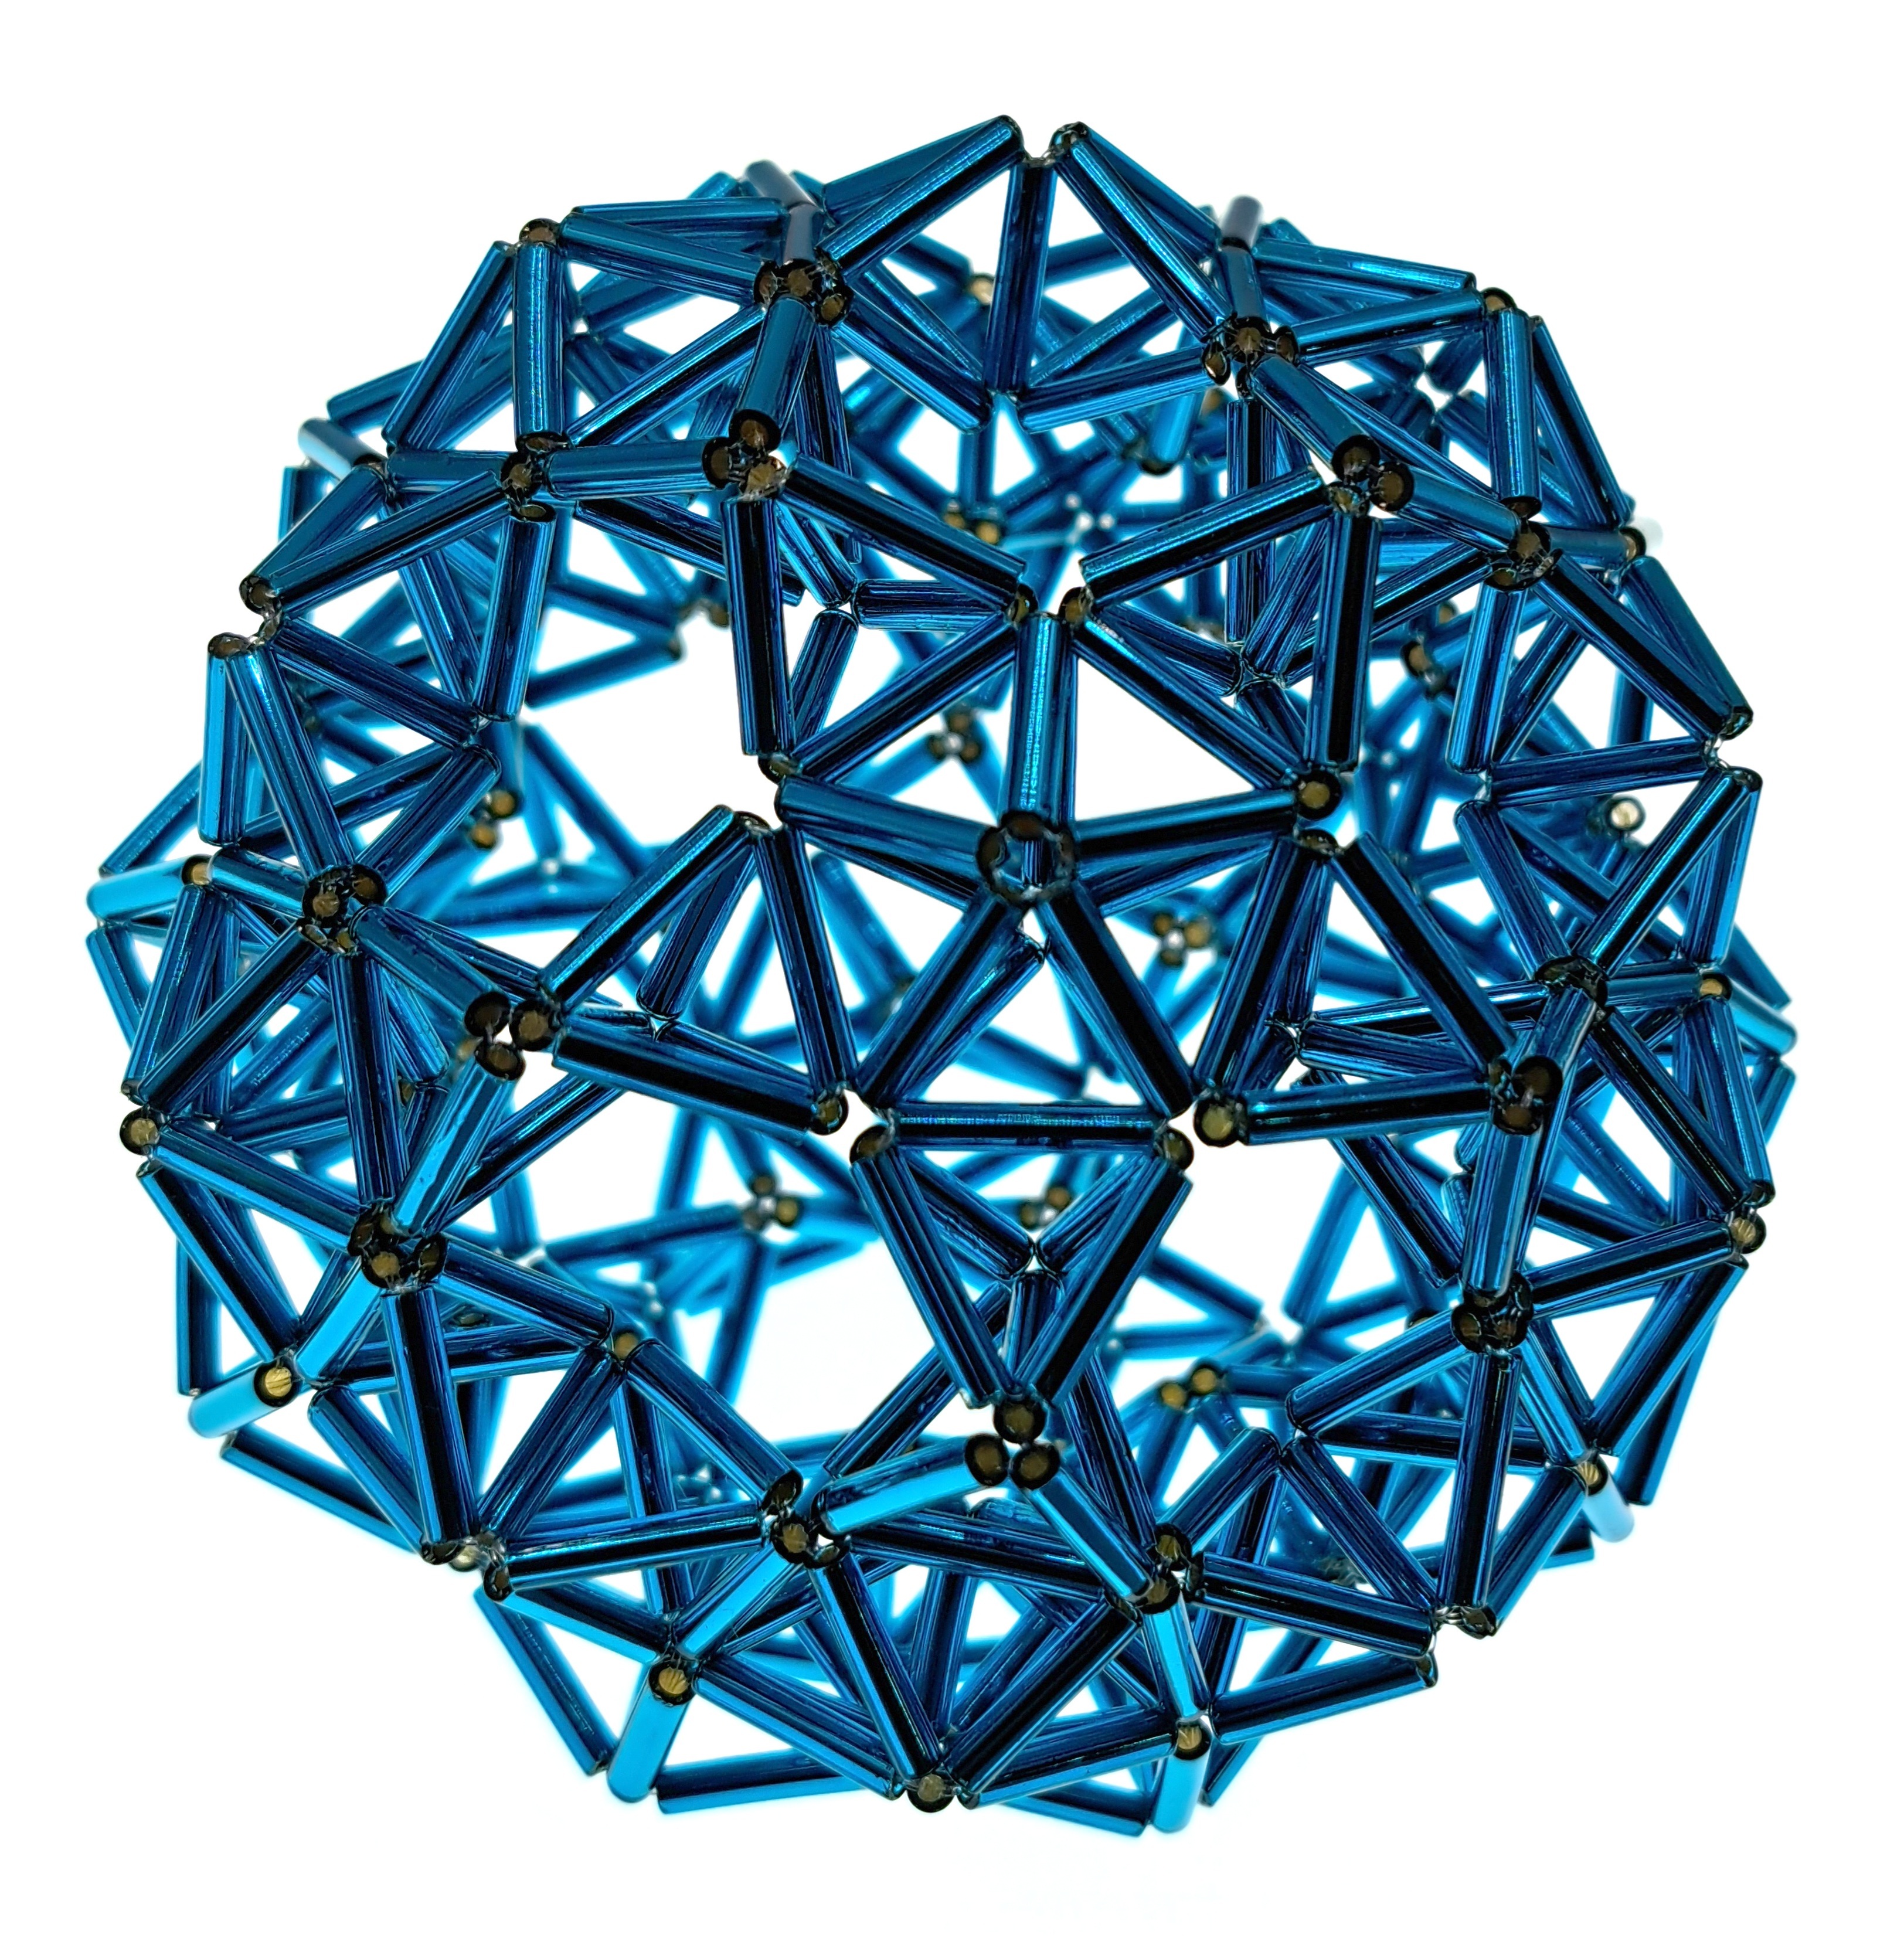
Here’s one of my favourite pieces from those I made last year, a bugle bead icosahedra made from clusters of tetrahedra and pentagonal bipyramids. This is based on a GeoMag version of the shape made by Livio Zucca.
I used what I call polyhedral RAW (PolyRAW?) and nylon monofilament to weave it, and it’s very stable – these larger geometric shapes can be a bit unpredictable when made this way, and some end up collapsing on themselves, but fortunately this one is just as stable in bugle beads as it is in GeoMag.
It’s made up of 12 pentagonal bipyramids (which are Johnson Solid J13) and 60 tetrahedra – with five tetrahedra clustered around each bipyramid. I haven’t been able to find any other references to this shape so far, although I have found a lot of information about pentagonal bipyramids and molecular geometry!
It’s been a while since I last wrote about the UK Johnson Solids Project – a UK iteration of Diane Fitzgerald’s amazing community project in the US. Sylvia Fairhurst, who organised the UK incarnation, has been busy looking for places to exhibit the collection since its completion. This was challenging when the project initially concluded, as we were in the middle of the pandemic, so open venues were few and far between. However, as the world has opened back up and beading meet ups have resumed the project is now finding places to be displayed.
The current venue is Spellbound Beads in Lichfield, just north of Birmingham. If you’ve not had the chance to visit them in person then maybe this is the excuse you need! (I recently managed to visit them myself for the first time after having spent many years ordering many beads from them online – it’s a fantastic bead shop and I highly recommend a visit!)
Photograph courtesy of Spellbound Beads.
You can view all 92 beaded Johnson Solids – along with the Archimedean and Platonic solids that were also part of the UK project – at Spellbound over the next 6 weeks. To find out more check out their Facebook page or website.
And if you’d like to read more about the original Johnson Solids Project, Diane has published a booklet about it complete with instructions on how to get starting with making these shapes. Find it in her esty shop!
Miyuki have recently announced that a number of Delica colours will be discontinued by the end of this year. The full list is available on their website.
Unfortunately, two of the main colours for the Saturn Box are on this list, with no suggested alternative: DB 1456 Silver Lined Light Taupe (the light grey used as colour C in the tutorial) and DB 1458 Silver Lined Light Honey Opal (the main pale yellow “Saturn” shade used as colour B in the tutorial).
After spending a lot of time going through a huge number of possible alternatives myself I’ve managed to find an almost identical replacement for the pale grey and two possibilities for the pale yellow.
For the pale grey DB 630 Silver Lined Light Taupe Alabaster is an almost identical replacement.
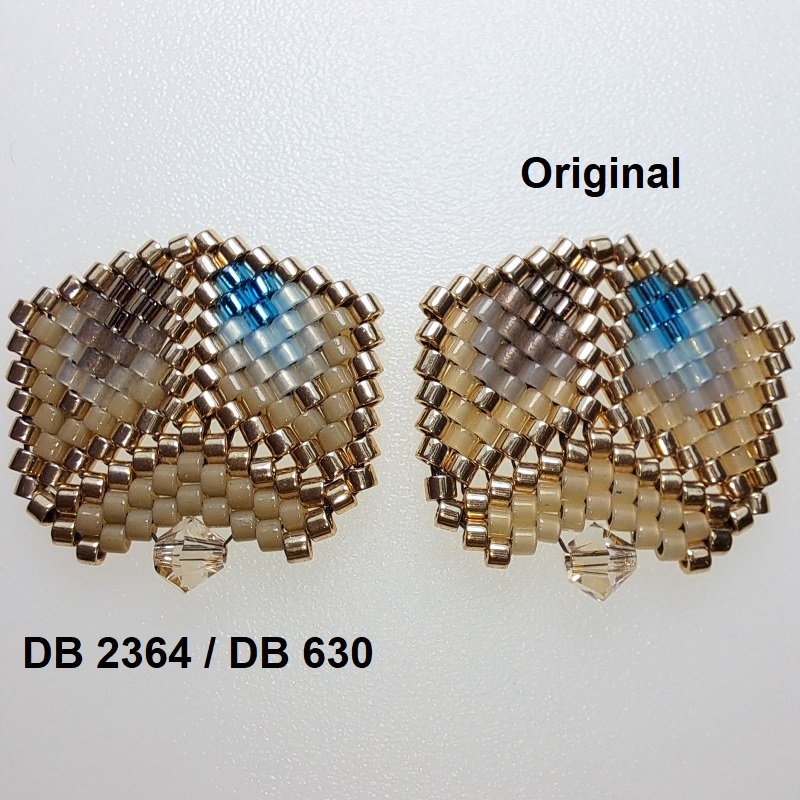
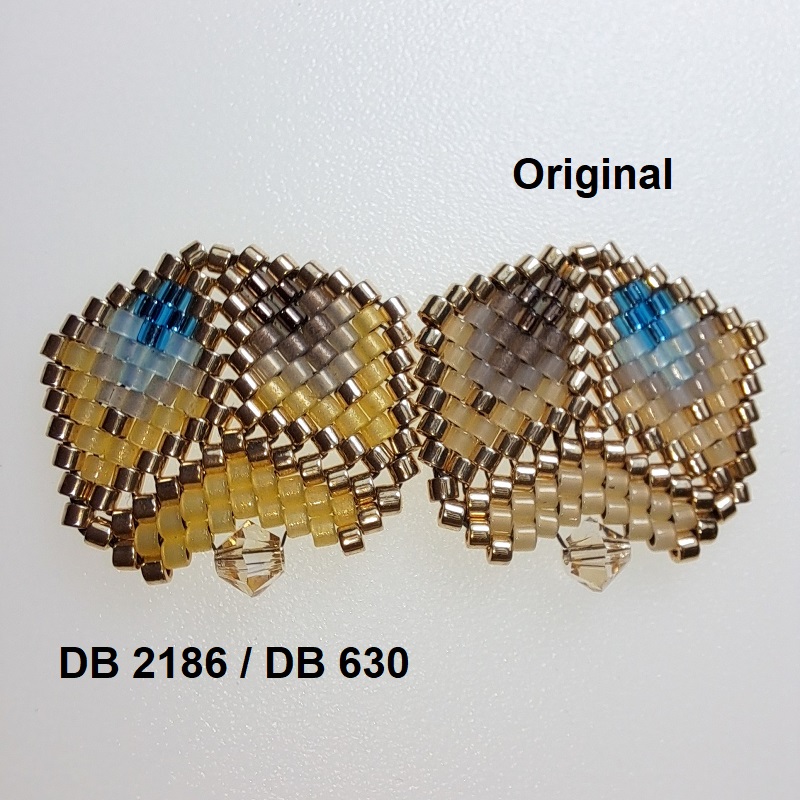
For the pale yellow there doesn’t appear to be any similar silver-lined colour available. There is a slightly darker yellow available, DB 2186 Silver Lined Duracoat Vinho Verde, but in my opinion it’s a bit too bright. A better colour match is DB 2364 Duracoat Opaque Dyed Moth Wing, and although it’s a not silver-lined I think it’s a good alternative.
Here’s a comparison of the two options with the original colour scheme:
Here’s a comparison of just DB 2364 and DB 630 to the original:
And here’s a comparison of just DB 2186 and DB 630 to the original:
Hopefully Miyuki will add true replacement colours to their range in the near future, but for now there are some reasonable options at least! I’ve updated the tutorial on etsy to include these suggested alternatives.
The Saturn Box is a beaded geometric box I designed in 2020 for the Beadworkers Guild Journal. The tutorial originally appeared in issues 87 to 90 of the journal between 2020 and 2021.
At the time the Saturn Box was the most complicated piece I’d ever designed (or written instructions for!). It was during lockdown and I was really focussing on beadwork as a distraction. I’d never made a beaded box before, so wanted to try something new for the journal.
It combined a few different ideas I had been playing around with and thinking of how to incorporate into a bigger design – the ring of half-stars and the half-diamond finish to the edges of the bowl in particular. It’s also one of the few of my pieces that includes crystals as well. I tend to keep geometric pieces to purely peyote stitch and Delicas, but the inside of the bowl was just missing something, and that something was crystal bicones!
Of course, as soon as I included them Swarovski announced they were going to stop selling crystals to beaders – typical! Fortunately I found Preciosa made a bicone in a similar (and possibly slightly better!) colour to accent the Delicas.
The original idea for the box started off with a near-miss Johnson solid. These are polyhedra that don’t quite have regular polygon faces, so aren’t one of the 92 Johnson solids, but are so close to being so you can make them pretty well with regular polygons. Some of the known near-miss Johnson solids have unusual patterns of polygons on their surfaces which offer lots of design possibilities! The particular shape I decided to base the box on is a near-miss discovered by Robert Webb:
This polyhedron has hexagons at the top and bottom, and a ring of triangles in the middle of upper and lower rings of pentagons. This shaped seemed ideal to base a box on, as it has a clear top and bottom and could be split along the central ring of triangles to make the lid and base.
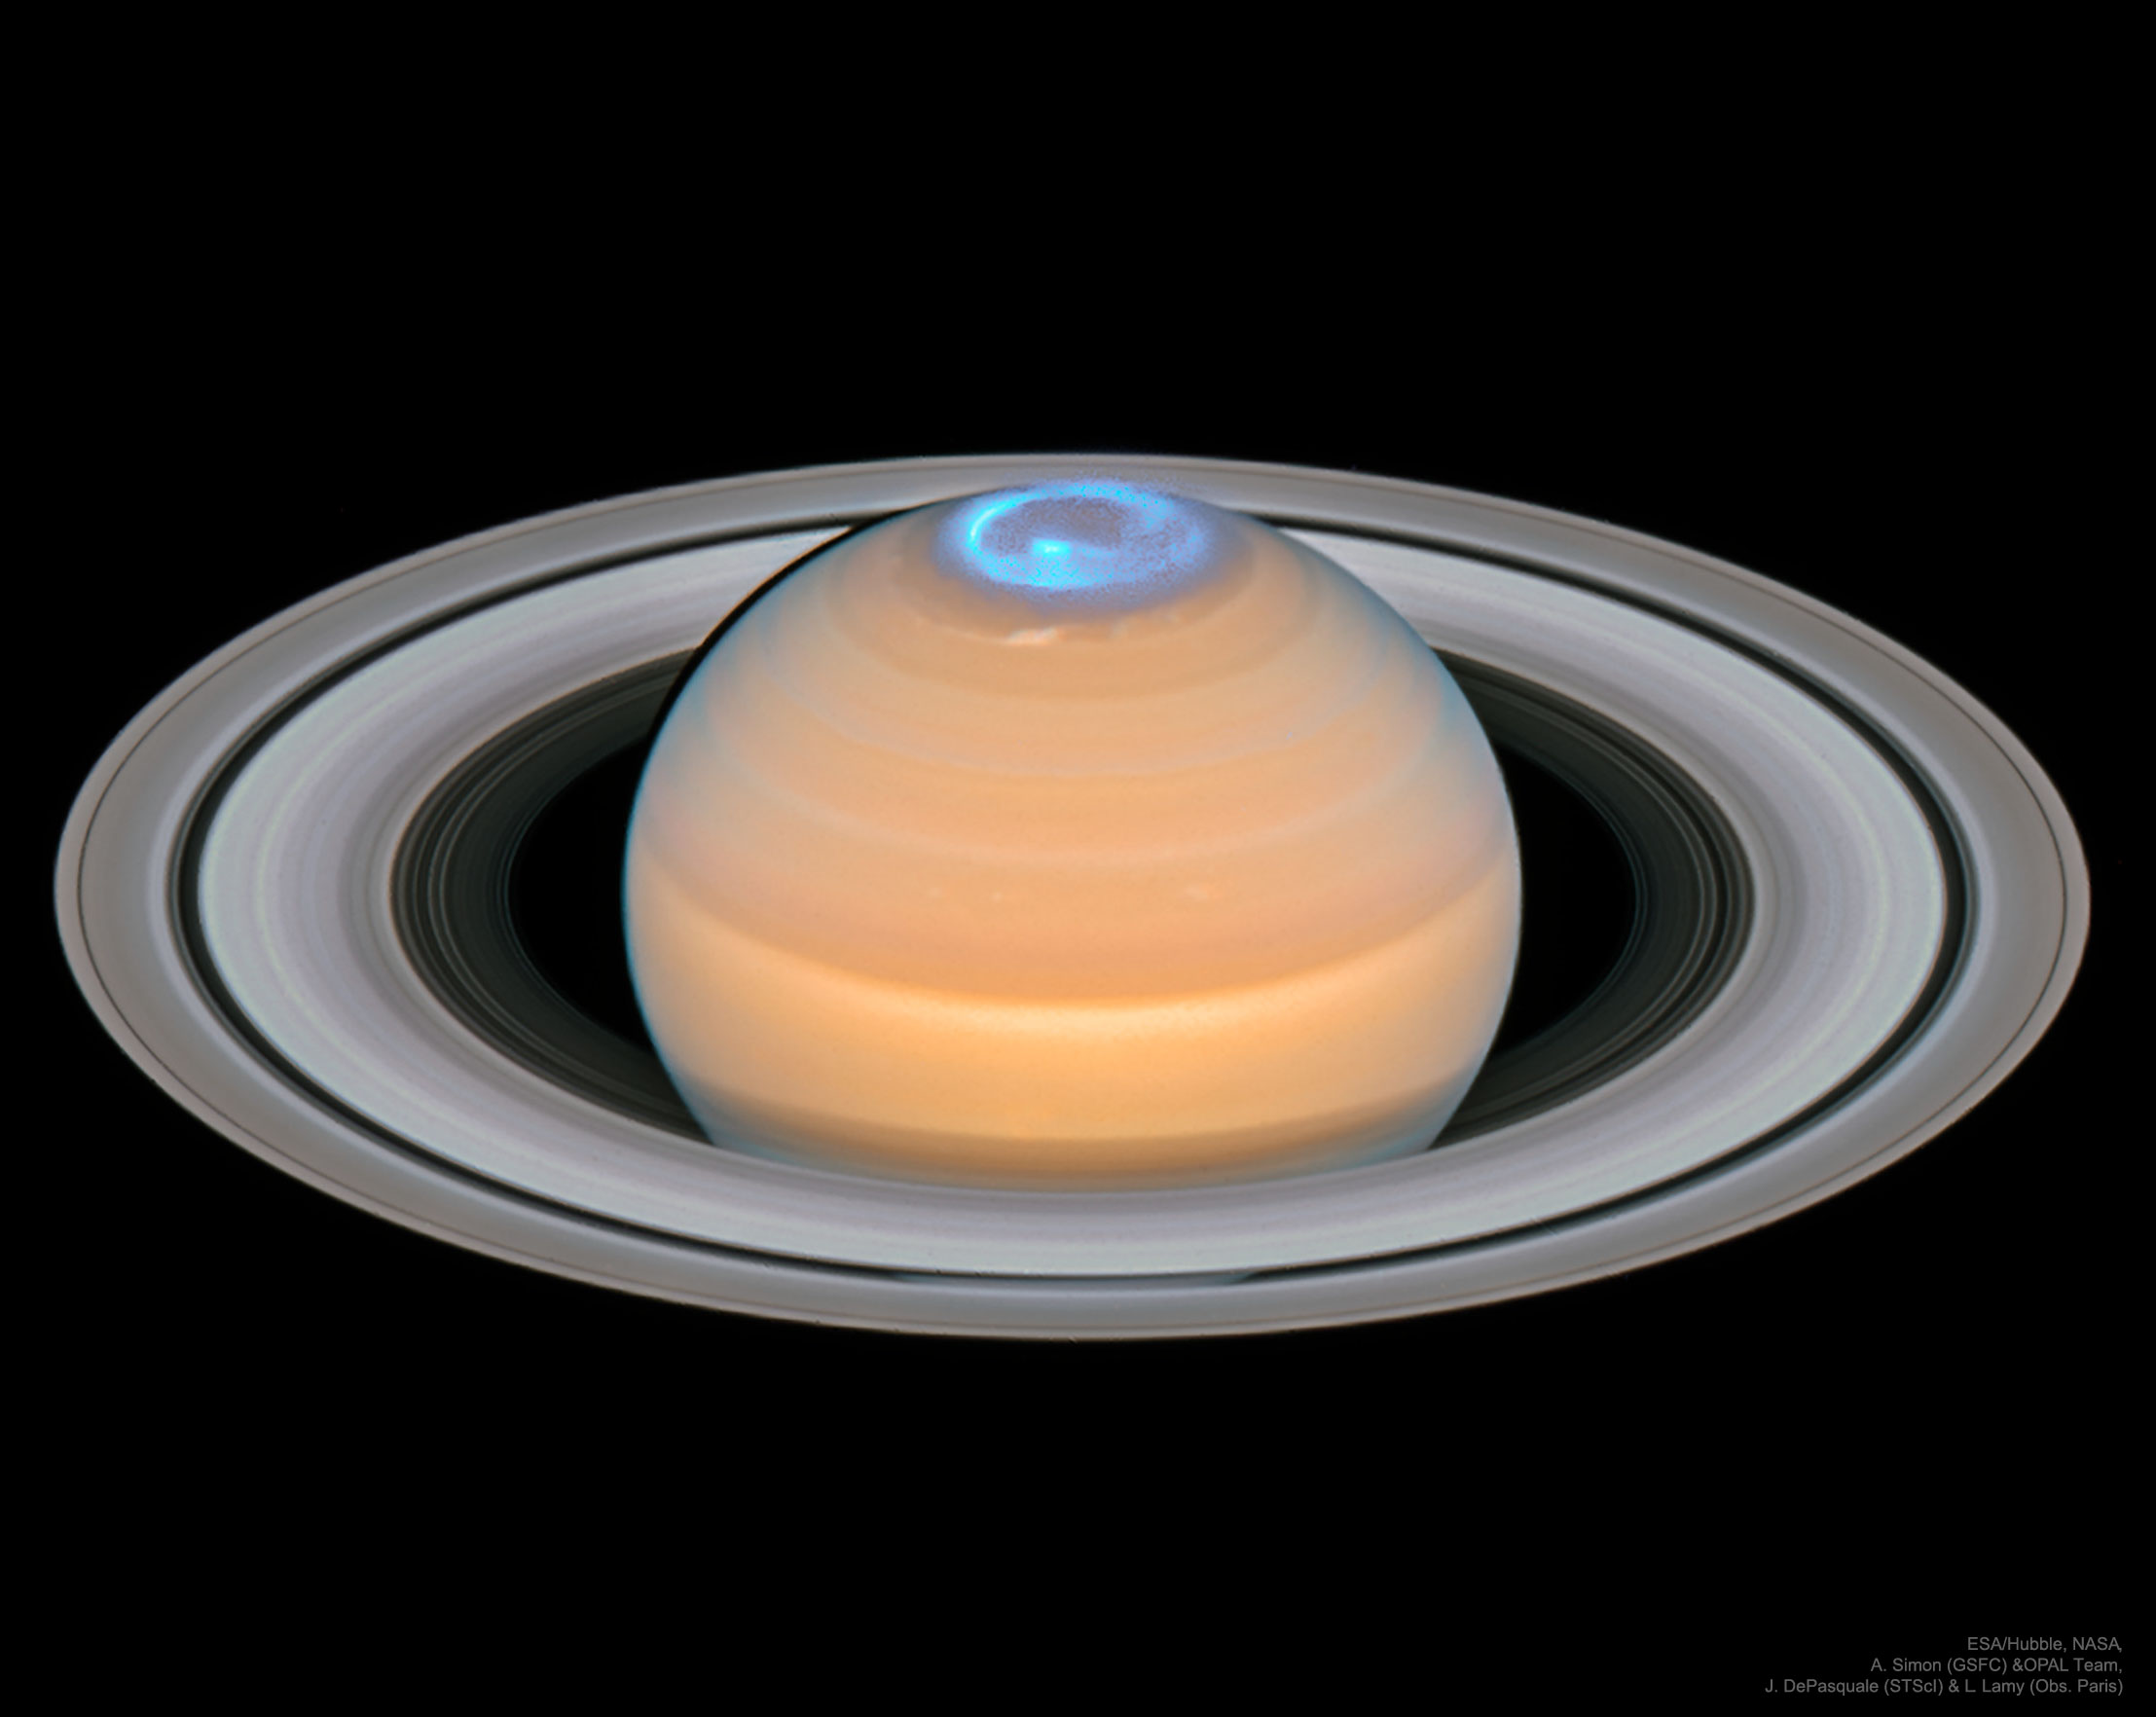
The ring of triangles would also allow me to incorporate the half-star idea I’d been playing around with into the design to form a ring around the box. I used to be an astrophysicist, and studied planets in particular, so that led me immediately to thinking about Saturn! That in turn led me to my colour inspiration – the false colour images of the aurora on Saturn:
These images were taken with the Hubble Space Telescope in 2017, and show the aurora at the North Pole of Saturn. These aurora mostly emit ultraviolet light, rather than visible light like the aurora on Earth. The image above is actually a composite image – a visible light photograph of Saturn from Hubble combined with a false colour representation of observations of the ultraviolet light captured using one of Hubble’s spectrographs. The false colour representation shows the ultraviolet light emitted by the aurora in blue, and I just love this representation of the physics and had to include it in the box design, with silver-lined beads doing their best to bring to mind this image!
After a lot of engineering and even inventing a new component I ended up with the final design! The lid of the box sits on the ring of half-stars, standing on six “spikes” formed by the points of the blue stars on the lid. I was really happy with the final design!
I’ve been meaning to write a standalone tutorial for this piece for a while – the size and complexity of the project was a bit daunting though! I finally convinced myself to sit down and start it before Christmas, and I’m really glad to now have it available in my Etsy shop.
I’m also really grateful to the small army of pattern testers who stuck with me while I tried to get this all written down in a reasonable size document the last few months!
If you decide to try making the box I hope you will enjoy it – although it is a lot of work, it’s also a varied piece with lots of different types of peyote shapes combined together. There are triangles, squares, pentagons, hexagons and some others you may not be familiar and some new ones invented just for this piece!
Although it was challenge to design and document this piece it’s a challenge I’d gladly undertake again – in fact I’m thinking of doing a few more planetary-inspired boxes!
I’ve been working on a tutorial recently so haven’t done that much beading, but have found some time to try out a new bugle bead shape. It’s a ring of 14 Snub Disphenoids:
A Snub Disphenoid is one of the Johnson Solids, and is otherwise known as J84, and is made up of 12 triangles. These polyhedra are joined together with square pyramids (which are also one of the Johnson Solids!) to create the ring.
I learnt about this shape on Rafael Millán’s GeoMag website. It’s actually about a degree short of being a perfect ring, but you can’t tell when it’s made with beads!
I used 12 mm bugle beads, nylon monofilament and what I call polyhedral angle weave – which is just regular angle weave used to make the various polygons that make up a polyhedron. It can just about be worn as a bracelet, although I think I will hang it up in a window as a geometric sun catcher instead!
It took me ages to get the colours picked out but I’m really happy with how the yellows turned out. Bit of a change from my usual blues but definitely going to try more yellows in future!
Unfortunately I discovered when I went to photograph it that my camera now has a column of defunct pixels in the middle of the image – so sorry about the odd line down the middle of the photo!