Beadwork, Polyhedra, Tutorials

Truncated Octahedron Hyparhedron

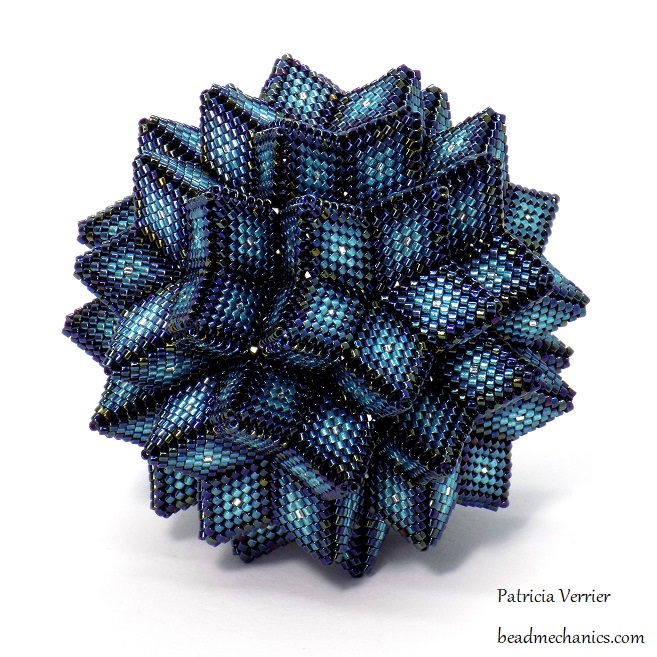
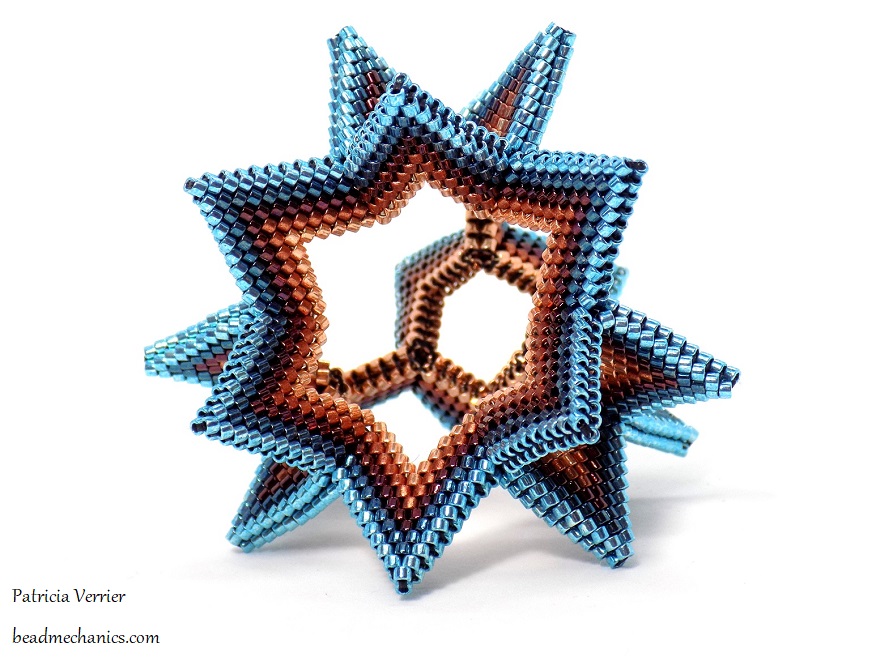
Here are some brief instructions for the truncated octahedron hyparhedron. This is actually a pretty simple shape to make. It’s just 4-hats joined together with a few extra warped squares. If you know how to zip together warped squares to make a star you can use the same method here! My warped squares are 7 rows in total, and I make them out to row 6 then use row 7 to zip to any other squares as needed.

truncated_octahedron_beadmechanics

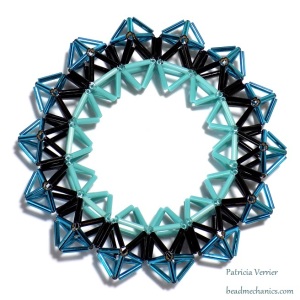
First join four warped squares with 2 brown sides and 2 green sides into an upside-down 4-hat – that is, with all the points in the centre pointing downwards. This will be one of the square faces you can see in the photo above.

trunc_octa1_beadmechanics

Here’s a diagram for the individual warped squares that make up the 4-hat:

warped_square

Make the first square completely all the way out to row 7 and stitch in the threads (the photo is in red and white instead of brown and green – sorry!):

TruncatedOctahedronStep1_BeadMechanics

Now make a second square out to row 6 and join it to the first square on one brown (or red!) side as part of row 7 as shown (note I’m working anticlockwise around the square):

TruncatedOctahedronStep2_BeadMechanics

Finish the round and weave in the end – you should now have two squares joined together like this:

TruncatedOctahedronStep2b_BeadMechanics

Make a third square out to row 6 and again join to one of the others on one brown (/red) side as part of row 7 as shown:

TruncatedOctahedronStep3_BeadMechanics

When this square is completed it will look like this:

TruncatedOctahedronStep3b_BeadMechanics

Make a fourth square out to row 6 and this time join it to the two remaining brown (/red) edges from the previous squares using row 7:

TruncatedOctahedronStep4_BeadMechanics

When this square is complete you will have a finished 4-hat like the one below!

TruncatedOctahedronStep4b_BeadMechanics

Here it is from the side – the centre points downwards (so technically it’s an upside-down 4-hat!):

truncated_octahedron1_beadmechanics

Make five more of these so that you have six identical 4-hats in total. The warped squares here are all edges of a square face on the finished shape.

Now make a completely green warped square out to row 6 (I use the same silver diamond pattern as before, but all the sides just have the same background colour). Step up for row 7 and zip it on all sides to two of the 4-hats, as shown on the left of the diagram below. The centre pyramid of both 4-hats should be pointing downwards. (Note that I’ve shown this new warped square in blue rather than green!) The new warped square is an edge of a hexagonal face. To show the shape flat I’m going to draw the warped squares slightly distorted (as on the right of the diagram) from this point onwards.

trunc_octa2_beadmechanics

Here are two 4-hats and a warped square ready to be joined together:

TruncatedOctahedronStep5a_BeadMechanics

Here are the first two sides being joined together:

TruncatedOctahedronStep5b_BeadMechanics

And here’s the piece from the other side showing last two sides being joined together:

TruncatedOctahedronStep5c_BeadMechanics

When the join is complete the beadwork will look like this:

TruncatedOctahedronStep5d_BeadMechanics

Here’s another in-progress photo from slightly later in the construction outlining how this square fits between two of the upside-down 4-hats:

truncated_octahedron3_beadmechanics

(Note though that this particular photo used a slightly different order for joining the squares than the instructions here!)

Repeat this step three more times to join three more 4-hats around the first, as shown in the diagram below:

trunc_octa3_beadmechanics

Now join in four more warped squares around the edge of the shape connecting some of the remaining edges of the 4-hats as shown below:

trunc_octa4_beadmechanics

The diagram above looks pretty distorted but in reality the warped squares will fit easily into place.

Turn the beadwork over. There will be a space for the remaining 4-hat, which should be joined in using 4 more green warped squares, as shown below:

trunc_octa5_beadmehanics

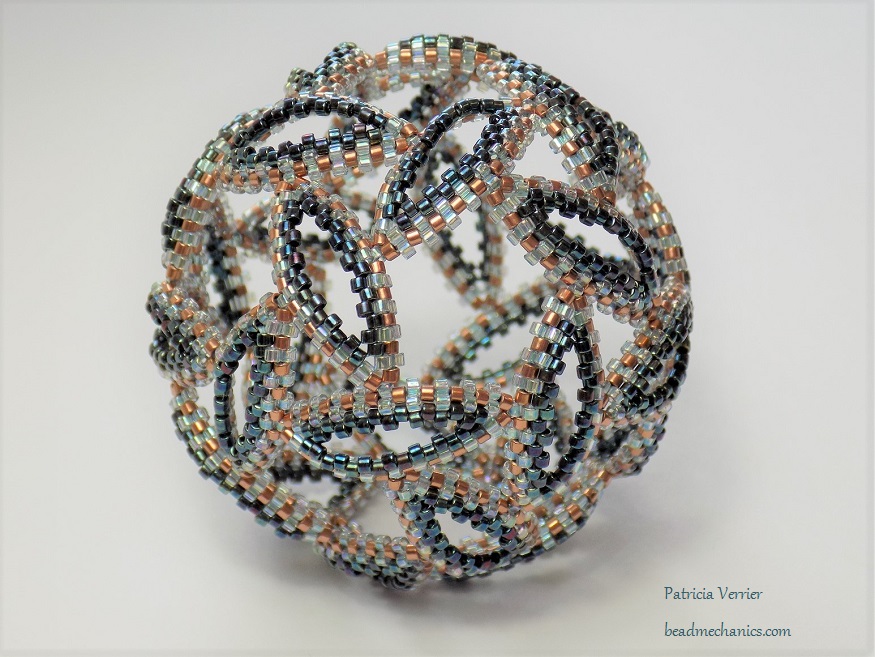
Once all these joins are finished the hyparhedron is complete. Sorry the instructions are a bit brief but if you have any questions just ask and I will try and help!


© Copyright 2019 Patricia Verrier. All rights reserved.

These instructions are for personal use only. Please contact me if you require more information.

Bangles, Beaded machines, Tutorials

Gyroelongated Square Bipyramid Kaleidocycle

Here’s my latest kaleidocycle!

The book “A Mathematical Tapestry” by Peter Hilton and Jean Pedersen has a discussion of the various rotating rings (kaleidocycles) of polyhedra that are possible, including a diagram of one made of 14 hexacaidecadeltahedra – better known as gyroelongated square bipyramids. It was such an intriguing shape I decided to try and construct one from bugle beads. The finished ring is fascinating – in one configuration it’s rigid but in others it’s completely flexible with many degrees of freedom.

beadmechanics_kaleidocycle1

It also makes a great bracelet as it will flex enough to fit over your hand but can then be rotated into the rigid configuration to stay on your wrist!

beadmechanics_kaleidocycle_3

I made the original version with 12mm beads (Matsuno size 5 twisted bugle in Silver-Lined Bronze), but it works with other sizes. The one above is made with 9mm beads (Toho size 3 bugle in Silver-Lined Teal, Opaque Turquoise and Opaque Jet). The bugles just need to be large enough for several thread passes! I use 0.25mm monofilament nylon illusion cord as the thread, which is strong enough not to be damaged by the bugles but thin enough to allow enough passes through each bead.

I did briefly try making a peyote version using triangles (in this case the units are Eva Mari Keiser’s “gyro-eggs”), but unfortunatly it didn’t work very well as the shapes lose their defining sharp geometric shape.

So what is a Gyroelongated Square Bipyramid? It’s two square pyramids (the square bipyramid part) connected with a strip of 8 triangles formed into a ring (the gyroelongated part). Here’s a square pyramid and a square bipyramid (aka an octahedron):

Here’s a strip of 8 triangles which can be made into a ring to make a square antiprism:

Put this in the middle of the square bipyramid (octahedron) and you get a gyroelongated square bipyramid:

It’s an interesting shape! The two pyramids are at angles to each other and you can find pentagons made from 5 triangles at almost every corner.

They can put together into a kaleidocycle by using evenly spaced bugle beads from the middle (the gold ones in the photo above) as shared hinges. These hinges will be at an angle to each other if you look at the shape from the side, rather than parallel. Turns out that this is the critical feature for getting a kaleidocycle to work, and it’s why you end up with sets of mirror polyhedra in a complete cycle.

Below is a tutorial on how to make a four-colour version of this kaleidocycle! Please be careful with it though – remember that it’s made from fragile glass beads which may have sharp edges, so should be treated with care!

Tutorial

Continue reading

Polyhedra, Tutorials

Truncated Tetrahedron

When I made the Sunburst dodecahedron I thought that the technique could be easily adapted to make other polyhedra. The flexible nature of the edges make it easy to adapt to shapes with different angles between the faces. I recently tested this idea by making a truncated tetrahedron, the piece below is the result:

tetra2_beadmechanics

A truncated tetrahedron has four hexagonal faces and four triangular faces, so the resulting shape looks quite complicated, and looks very different from different angles!

tetra1_beadmechanics

It’s a bit smaller than the original dodecahedron, but not by much. Here they are side-by-side for comparison:

tetra_sunburst_beadmechanics

I really enjoyed making this piece and I was pleased by how easily the components could be used to make both triangular and hexagonal faces. I have a lot more ideas for other shapes now too!

Instructions for both these pieces are in the Sunburst tutorial in my Etsy shop! (And a huge thank you to Sue Harle for permission to use her original diagonal tubular peyote technique in the tutorial!)

Beadwork, Tutorials

Warning about Phishing Websites

Please be aware that a number of phishing websites have come to light over recent days that have copied a large number of beadwork and craft listings from Etsy, apparently in order to scam people out of payment information. Unfortunately some of my tutorial listings appear on some of these sites. These are not genuine listings!

My tutorials are only available from my Etsy shop, Interweave and here on my website.

You can find a full list of those available on the tutorials page.

Finally, please be careful when following links from sites such as Pinterest – always check that the link is genuine before clicking! Be(ad) safe out there!

Beadwork, Polyhedra, Tutorials

Rick Rack Dodecahedron (with Tutorial!)

I was challenged a while ago to see if I could make a dodecahedron out of rick racks. After a bit of experimenting I ended up with this, a Contemporary Geometric Beadwork rick rack dodecahedron!

rickrack_dodecahedron_2_beadmechanics

It’s made from small 5-sided rick racks joined together with warped squares. The rick racks are the light blue beads you can see, zipped together at the top with dark blue beads. The warped squares joining them together are the dark blue diamonds you can see in-between each rick rack.

rickrack_dodecahedron_3_beadmechanics

Continue reading

Beadwork, Polyhedra, Tutorials

New tutorial!

I’ve finished the tutorial for my first beaded icosahedron – now named Whirlwind! You can find the tutorial in my brand new etsy shop: www.etsy.com/shop/beadmechanics.

whirlwind_beadmechanics_1

I’ve been working on this for a while – it’s been quite a learning experience! The tutorial is 21 pages with more than 60 photos and diagrams – there’s also a net for a paper version of the model you can cut out and make to help with putting the beadwork together!

I’d always intended to make this icosahedron again so I took the opportunity to take photos as I went along so I could write a tutorial. The new version is actually the mirror image of the original – so now I have a matching pair! (Some brief instructions on how to make a second one so you have a matching pair are also included in the tutorial!)

whirwind_beadmechanics_2

Happy beading!