Here’s the tutorial for the trefoil knot kaleidocycle I posted a video of a few weeks ago!
This is pretty quick to make, it just takes a couple of hours or so, and it’s also pretty fun to play with when it’s finished!
This tutorial is also available as a pdf!
Materials
The version in this tutorial is made with two colours of bugle beads – one for the hinges and one for the other sides of the tetrahedra. In the original version I used only one colour, but it can be quite hard to see where the hinges are when you’re making the first few tetrahedra!
- Matsuno 12mm bugle beads:
- 3g hinge colour, I used gold #634
- 8g main colour, I used green #647
- Illusion cord, 0.25mm (0.01″) diameter, clear
Overview
We’re going to make a string of 21 tetrahedra, joined to each other on one bugle bead (which will act as the hinge). We’ll then tie a knot with the string and join the ends together by making the last (22nd) tetrahedron.
The tetrahedra are all made from what I’m going to call tetrahedral right-angle weave, which is exactly like cubic right-angle weave and prismatic weave, except we’re going to be making tetrahedra instead of cubes or prisms.
Step 1 – Making the first tetrahedron
You need about 15′ of thread to make the whole kaleidocycle (that’s about 3 armspans). To make life easier I unreel about half that the spool and then work without cutting it off. When I run out of thread I then unreel the rest needed, cut it off and work from the other end.
Start by stringing 1 gold and 2 green bugles, leaving about a 10″ tail, then form them into a triangle by passing through the first gold bead again:

Then string 2 green bugles and pass through the gold bugle again to make a second triangle:

Then pass through the green bugle on the other triangle like this:

Now we add the final gold bugle to make the tetrahedra. String 1 gold and pass through the green bugles marked 1 and 2 on the image above, and then again through the gold bugle just added, like this:

Finally, complete the last remaining face of the tetrahedra by passing through the 2 green bugles on the other side and then the same gold again:

That’s it for the first tetrahedron, now on to the second!
Step 2 – Making the second tetrahedron
The gold bugles are the hinges of the kaleidocycle, and so the next tetrahedron is built from one of the gold bugles in the first. String 2 green bugles and pass back through the gold bugle on the first tetrahedron:

String 2 more green bugles and pass through the gold bugle once more:

(This last thread pass can get a bit tricky if the gold bugle is a bit narrower than normal – but if you hold the thread with a pair of tweezers that seems to make it easier.)
We now just have to add a gold bugle to the second tetrahedron. Pass through the first green bugle added, string 1 gold bugle, then pass through the top green bugle from the other triangle, like this:

Finally, complete the last face by passing through the gold bugle then the two other green bugles and then the gold bugle again, like so:

That’s the second tetrahedron completed!

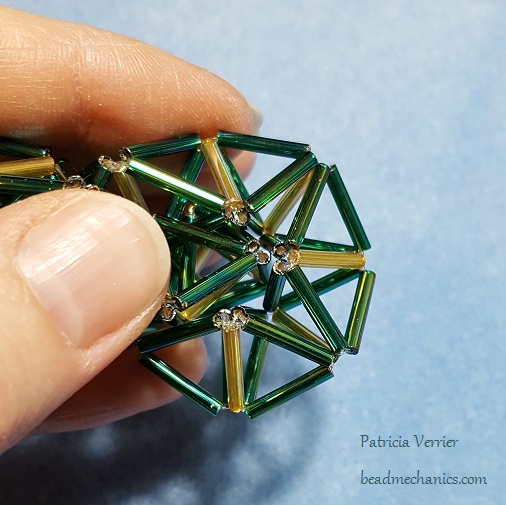
Step 3 – Making tetrahedra 3 through 21
The next tetrahedra are all added in the exact same way as the second in Step 2 above:

Keep going until you have 21 complete tetrahedra. Then add the first two triangles of the last tetrahedra:

Don’t add the last hinge gold bugle, it will be shared with the first tetrahedron.
You should now have a string of 21 and a half tetrahedra that looks like this:

Now the fun part – tying the trefoil knot!
Step 4 – Tying a trefoil knot
A trefoil knot is just a simple overhand knot. Start by laying the string out flat and then moving the working end (the one with the incomplete tetrahedron) over the other end:

Now pass the working end under and through the loop:

You should now have something that looks like like this:

We now just need to bring the two ends together like this:

I’ve drawn the outline of the knot in blue on this photo. It looks a bit confusing, but don’t worry it’s actually pretty simple when you have the beads in front of you. (It’s just hard to photograph!)
Step 5 – Joining the ends together
Now we just have to join the two ends together. This is done as before, except instead of adding a gold bugle you use the one from the first tetrahedron. Pass through this gold bugle and then remaining two green bugles on one incomplete face on the last tetrahedron:

Then pass through the gold bugle again and then green bugles on the other incomplete face of the last tetrahedron:

When joined it should look like this:

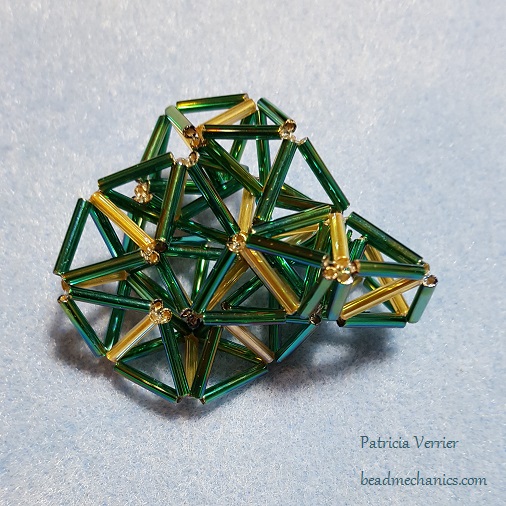
The kaleidocycle doesn’t have many degrees of freedom when you’ve tied the knot so there isn’t much risk of getting it twisted – there’s only one way it wants to join up at this point! When it’s joined right it should look like three inter-connected regular kaleidocycles:
Weave the ends in by passing back along the tetrahedra. I try and join the ends so the tail from the first tetrahedron is woven into the last one, and vice versa, to give a little bit more strength to the join.
You may find that you’re not able to make any more passes through the gold bugles at this point – if so, just zig zag back and forth through the green bugles on one tetrahedron.
Step 6 – Finished!
That’s it! The trefoil knot kaleidocycle is finished – now you just have to learn how to turn the three interlinked parts at the same time! Have fun!
© Copyright 2017 – 2019 Patricia Verrier. All rights reserved.
These instructions are for personal use only. Please contact me if you require more information.

Thanks so much for sharing this interesting project with us.
I will try to make one as soon as I get the materials.
LikeLiked by 1 person
I have made one following your instruction.
Fun!
Looking forward to see your seed beads trefoil knot kaleidocycle.
Zoe
LikeLiked by 1 person
I’m planning the triangle patterns out at the moment! Hopefully I’ll have some time over the holidays to start beading them!
LikeLike