Reconfigurable materials are materials without a fixed shape – surfaces with a shape that can be changed to different configurations. They have some similarities to kaleidocycles and folding cubes, as you can see from this video from the Harvard John A Paulson School of Engineering and Applied Sciences:
Here’s another video from Johannes Overvelde, one of the researchers who studies these surfaces:
Diane Fitzgerald recently posted a challenge in the Johnson Solids Project group on facebook to try making beadwork versions of these structures. Lots of people rose to the challenge and before long there were lots of photos of beaded reconfigurable materials!
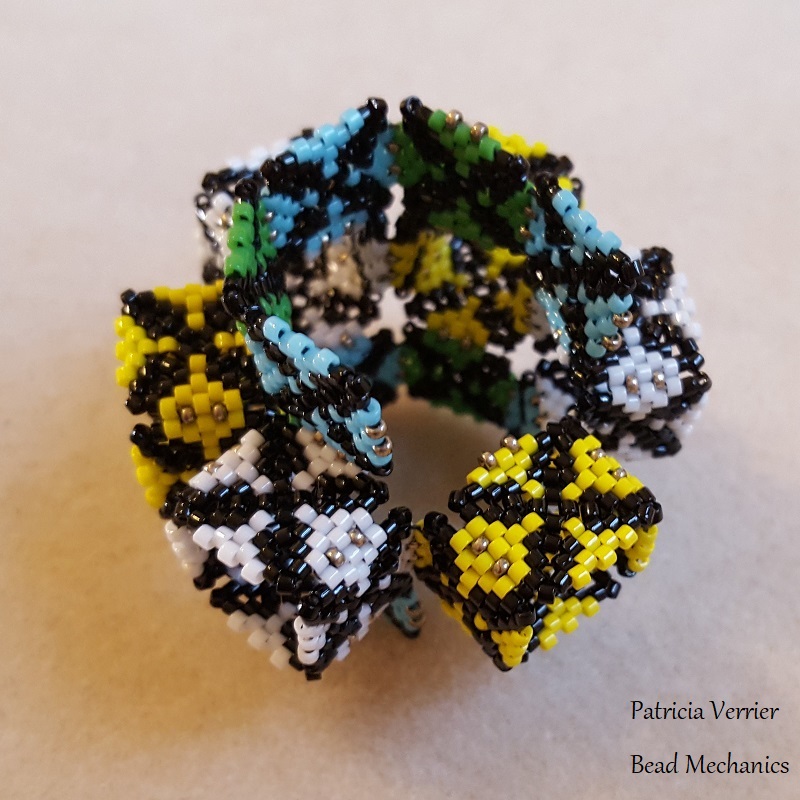
Here’s one I made in response to the challenge:

This is based on the hexagonal prism unit from the paper Rational design of reconfigurable prismatic architected materials (Overvelde et al., 2017, Nature 541, 347), which you can see in subfigure k in Supplementary Figure 7.

You can see that it follows the outline of a hexagonal prism, with pairs of squares added to each edge. It reconfigures to a lot of different shapes:


It’s interesting to see just how different it can be made to look! However, it is also however very fragile, as the peyote squares put the corner beads under a lot of pressure, so you need to be very very careful with it (I had a sliver of glass ping off one of the beads while folding it into a different shape!).
If you want to try making one of these fragile but interesting shapes, here’s a brief walkthrough of how I made this hexagonal prism unit. I used the same sized squares as in the Beaded Johnson solid project and used size 15 seed beads for the hinges.
Start by making a square and add hinge beads on three of the sides:

Make another square, and add hinges on two of the sides. Then join it to the first square by zipping it together on the third side – I did a brick stitch loop around the first and last beads in this join as well to make it a bit more stable:


You should now have two squares joined together like this:

Now join another square to these two in the same way:

Make a fourth square and start joining it to the other three:

Once it’s joined on one side, fold the strip of squares into a ring and join the remaining edge to the first square:

When the join is complete you’ll have a ring of four squares:

Note that you’ll have hinge beads around the unjoined edges on one side only.
The next step is to make the squares that sit above and below this ring of squares. Start by making another square, and join it to one of the edges of the ring of squares:


Make another square and join it to the opposite edge of the ring of squares in the same way:

This completes the first of six units that make up the hexagonal prism.
The next step is to add another unit to the first one. Start by adding a square to one of the unjoined hinge sides of the central ring of squares on the unit just made, and add three more squares to that as shown, leaving the working thread on the last square as shown:

Note the hinge bead placement on the squares in the photo.
As before, join the last square on the strip of four to the first square to make a ring:


Now add squares to the top and bottom of this ring as before, but this time joining them to the blue squares from the first unit as well:


That’s two units complete! Now add three more in the exact same way:

Now you just need to add the sixth unit that will join to both the first and last one to make a ring. Start by adding a square to the central ring of the last unit, noting the hinge placement on this square:

Add another square to the central ring of squares on the first unit in the exact same way:

Now take the beadwork and fold it around into a ring, so the two new squares added are folded to make two sides of the last ring of four squares from the sixth unit:


Join in a third square across the gap between these two:


Turn the beadwork over and join in a fourth square between the other sides of the squares, to complete the ring:


The last step is to add the final two squares above and below this ring of four squares. These squares will be joined on three sides – to the blue square from the fifth unit, the yellow square from the ring just made, and the blue square from the first unit.
Add the first of these squares below the ring just made:


The next step is to make several of these basic units and join them together into a larger structure. There are also many other basic units to explore as well!
To see photos of some of these explorations and the beaded masterpieces others have been making for this challenge head over to the Johnson Solids Project facebook group!

Have you tried metal beads for stress points?
LikeLike
I use nylon thread and find metal beads more likely to cause it to break … so I’d need to switch thread too! I have thought about plastic beads like Hama beads for these shapes though, but not tried it yet
LikeLike
Great idea to try the plastic beads!
LikeLike