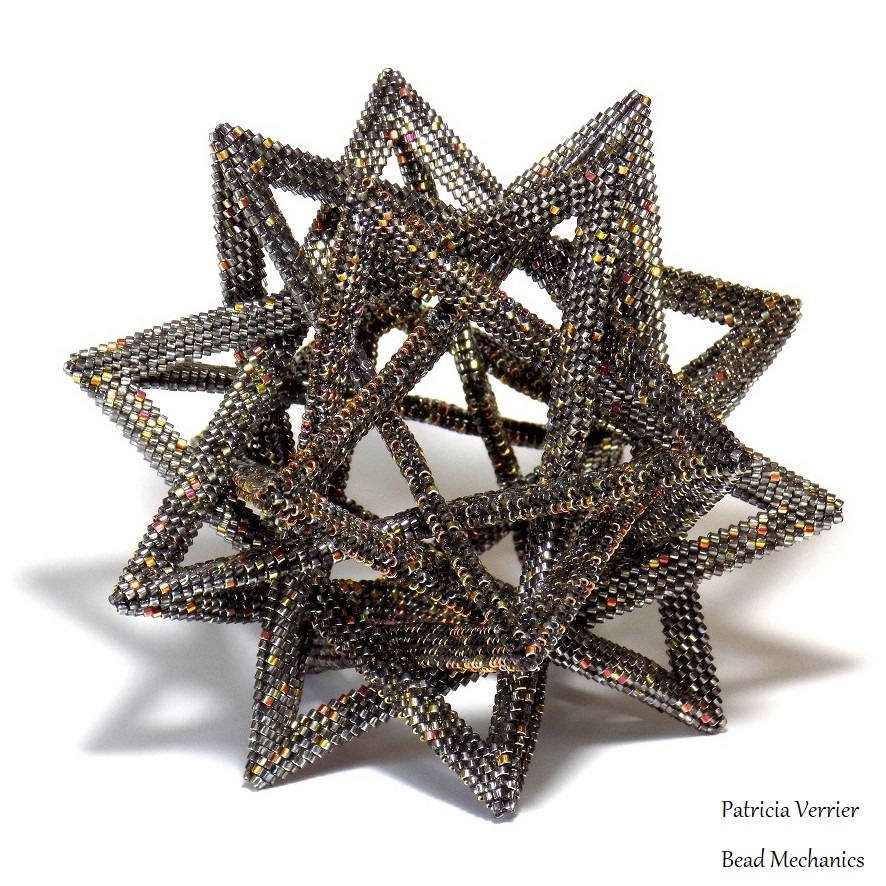
Earlier this year Diane Fitzgerald posted a geometric challenge: make a beadwork version of the origami model of five intersecting tetrahedra. After many months of work here’s my version!
I’m not the first person to make this – Kris Empting-Obenland gets the credit for that! Her beautiful version has been accepted to this year’s Bridges conference – you can see it in the Bridges 2019 gallery here!
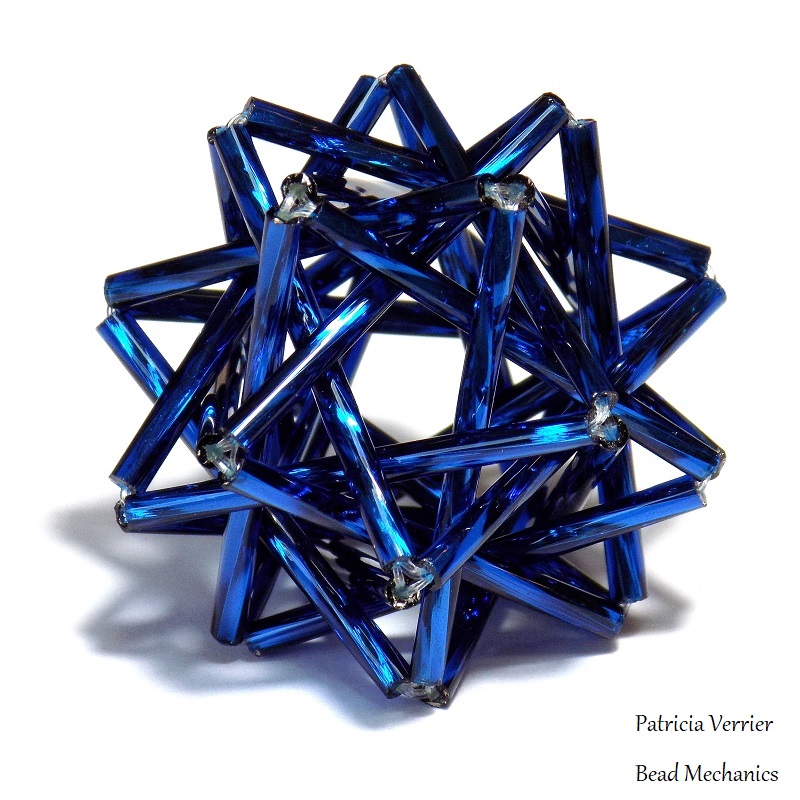
Five intersecting tetrahedra is an interesting compound shape that has some similarities to a dodecahedron. I’m always interested in geometric challenges so I decided to see what I could do. My first attempt was with 30mm bugles, which worked surprisingly well!
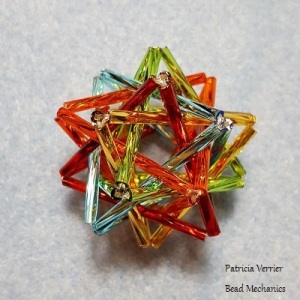
If you want to try making one of these I recommend working from a video showing the construction of the origami model, like the one here. However, I definitely recommend using similar colours to those shown in the video – and not what I did, which was mostly similar colours but in a different order which got very confusing!
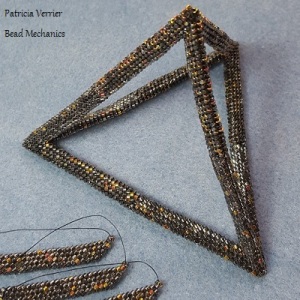
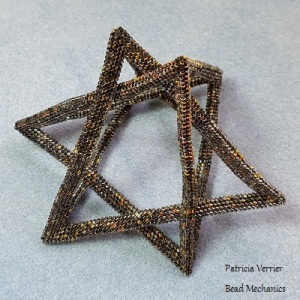
My next step was to take a few ideas I had been working on following on from my Sunburst dodecahedron, which uses Sue Harle’s tubular diagonal peyote technique. I realised I could use this technique here to make individual beams for the sides of the tetrahedra, meaning the construction would be very similar to the origami version – and hopefully that it would be easy(ish) to join together. Here’s my first attempt at a tetrahedron using this method:

It worked! My next step was to work out the dimensions of the beams so that the compound would work – if the tetrahedra are too small then you can’t interlink them, if they’re too big then it won’t hold its shape. Because the geometry of the beams here is very slightly different to the origami version they need to be a very slightly different size so the model will fit together correctly. So there was a brief interlude from the beadwork for some maths to work out the exact size, which turns out to be a ratio of width to mid-beam length of 1:13.5441. I checked this calculation three times and then asked someone else to check it, as I had nightmares of making 5 tetrahedra that were all slightly too small to fit together!
The next step was to start beading. I spent a lot of time measuring and re-measuring the first few beams to check the size (I’m very glad I invested in some digital calipers a while ago!) but eventually managed to make a full size tetrahedron – 1 down, 4 to go!
I decided to use just one colour, which also gave me an excuse to use some Crystal Marea delicas that I’d been wanting to make something with for ages!
The next step was to make the second tetrahedron. This one was easy to assemble around the first, and it seemed like I was making reasonable progress.
However, experience from the bugle bead version (or rather, experience unpicking many mistakes in the bugle bead version) left me feeling a bit apprehensive when it came to the next tetrahedron – and I ended up leaving the project to languish for a few months.
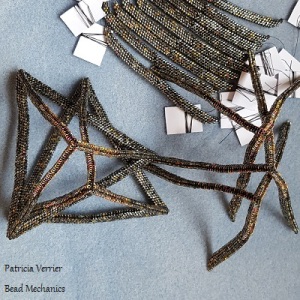
To try and make it easier to pick up I tried making another bugle bead version – this time all in the same colour. However, this ended up being so difficult it didn’t really help my confidence at all! I decided to just make all the beams for the remaining three tetrahedra then set aside a long weekend to try putting them together. Here are all the pieces ready for the final assembly:
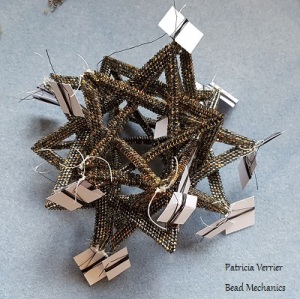
I was dreading this bit, so decided to just tack the beams together at the ends with separate thread to make it easy to take apart if (when) I made a mistake. To my surprise though it went together fine – I’d like to think it was all the practice with the bugle bead versions, but I think it might just have been luck! Here’s the initial assembly, before I stitched the beams together properly – it’s a bit of a tangle!
But it gradually sorted itself out into something more symmetric and geometric!
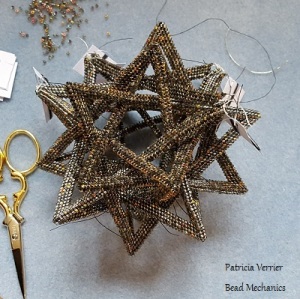
At this point it became clear that the beams were the right size – which was a huge relief! Then it was just a matter of stitching in the last few threads to finish the piece and complete the challenge!
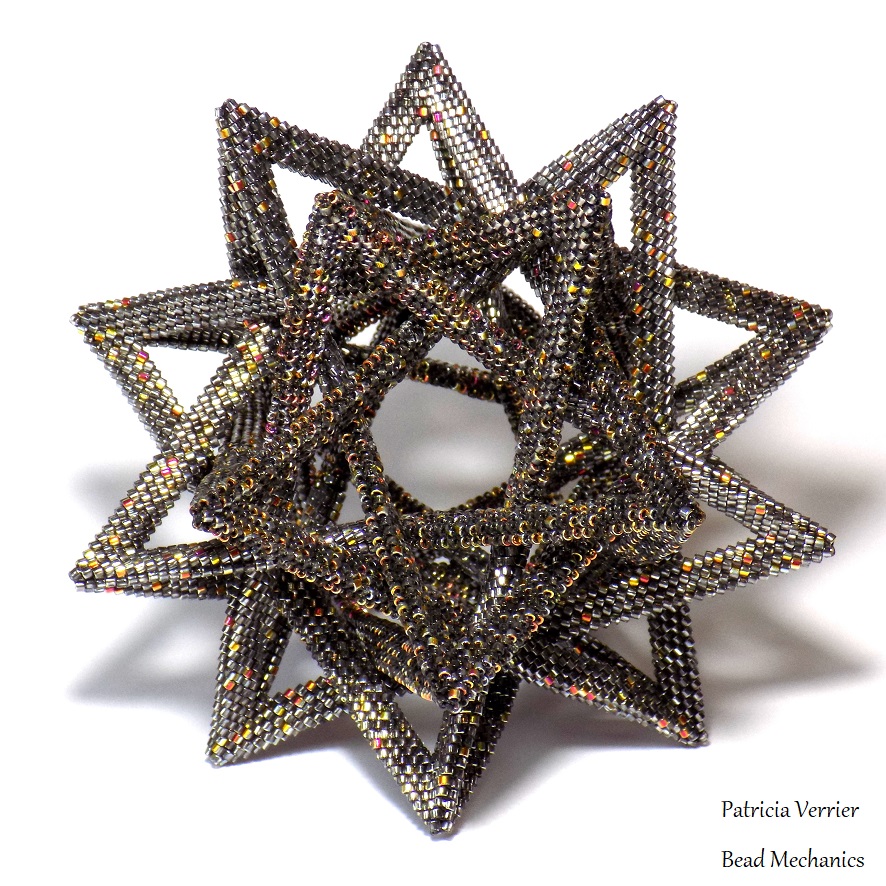
And this definitely was a challenge! But I’m glad I attempted it as it pushed me to develop a few new construction ideas, and even though at times failure felt inevitable I did enjoy the process! Also, at about 65g of delicas this is easily the largest piece I’ve ever made!
And as for that second bugle bead version? I did eventually manage to get it to work – and it’s now one of my favourite pieces!

I am so impressed with what you did…..I also saw Dianne’s challenge but didn’t think I was up to the challenge. I figured the
problem would be the size or length of the “connecting beams.” And after reading your post, I don’t know if I’ll ever be able
to make one of these……Also saw Kris’s impressive work…..I love geometric beading… but rather then try to see if I can figure out certain techniques and failing, I’m using various tutorials by others, to help me understand connecting….so I’m almost finished with your Rick Rack Dodecahedron tutorial and loving it….Congratulations…..amazing work….
LikeLike
Thank you Suzanne 🙂
I did almost give up trying to get the initial tetrahedron to work – I was just on the point of abandoning it when I realised I could use an idea from another piece of mine to make it so I think it was just luck that was in my mind at the time. And the size of the beams was nerve racking! Even when I had all the pieces tacked together it wasn’t obvious if it was going to work right – I was just too stubbon to give up!!
But on the plus side I can now tell anyone else who wants to make one what the correct size beam is 🙂
LikeLike
Oh wow well done such patience
LikeLiked by 1 person
Not a ‘math’ person at all, just a lover of the beauty in geometric beadwork! I’m curious as to whether the individual pieces stay in place due to tight stitching, or are they supported by the other beams surrounding them?
LikeLike
The beams themselves are strong enough to support themselves – although you can bend them slightly into curves (which you can see in some of the in progress photos). I think any longer and they’d start to be a bit too flexible, but thankfully they work ok here!
Each beam is just touching two others, but it’s not needed to support the structure. (But it is part of why this compound in general is so interesting! And also why there was a lot of measuring to get it right!)
LikeLike
I’m curious about sizing….your original piece was made with bugle beads that, I believe, are all the size size…..so then my question is why wouldn’t the beaded triangles all be the same size without having to figure out the detailed math??? I know I’m missing something here but not sure what……and why I haven’t attempted this project…..yet!!!
LikeLike
It’s the ratio between the width and length of each beam that needed working out – but your right, that then it’s the same for all of them. (Luckily the 30mm bugles are just the right ratio of width to length!) The origami version is a 1:12 ratio because the sides of the triangles slope outwards more so there’s more space, while the more solid beams here means they need to be a little bit narrower.
And I did miss several things and make a few mistakes working this all out too – it’s really hard to visualise without a handy 3d model!
LikeLike
What an amazing work.
Another masterpiece!
Will there be a tutorial in near future?
LikeLike
Thanks! 🙂
I’m not sure it would be possible to write a tutorial for this one! I am trying to work out a good reliable method for the bugle bead version though so might write that up if successful!
LikeLike